Mini Mudroom in the Garage: Before & After Transformation
Living in a smaller home often means making creative use of every available space. Since we didn’t have room for a traditional mudroom inside, I decided to build a mini mudroom in the garage. My goal was to complete this project for under $1,000. I tackled this project step-by-step to create a functional and stylish entryway solution and did it in a doable way that I truly feel like anyone could recreate! Here’s how it all came together.
Before: The Problem Area
Our garage had an old sink hookup that was no longer in use, and the area was cluttered and inefficient. I started by hiring a plumber to remove the sink hookup and cap the pipes. Once the area was cleared, I patched the wall, knowing I’d cover it with a 4×8 shiplap panel. There’s something so satisfying about seeing a large panel transform a space instantly!
Choosing the Right Cabinets for the Mini Mudroom
For storage, I opted for preassembled cabinets. One tall pantry tower (to use as a coat closet!) and one wall cabinet. That was all I could fit in the space that I had, but you could totally customize the prefab cabinets to your space and dimensions. The pantry cabinet is deep enough to hang coats, making it a versatile option for our needs. I securely installed the cabinets into the studs, ensuring they were sturdy and durable. To address a small gap between the cabinets and the wall, I added trim pieces for a polished look. And don’t worry, I closed in the gap at the top too so it doesn’t become a home for critters.
Building the Bench For the Mini Mudroom
A key feature of the mini mudroom is the bench, which I made from a butcher block counter slab. Not only does the butcher block’s wood grain add character, but it also absorbs stain beautifully. I chose a warm, rich “Early American” stain, which complements the overall design. It ended up being super solid and sturdy. It was a simple assembly, I just cut the slab down to the width I wanted and then did two cross cuts to make the “legs”. Then I assembled everything together with wood glue and brackets.
Painting and Finishing Touches on the Mini Mudroom
To revamp the cabinets, I used Rust-Oleum’s Cabinet Transformations kit in “Forbidden Forest,” a deep, earthy tone. The kit provided excellent coverage and a smooth finish. For the hardware, I opted for budget-friendly options that I spray-painted to match my desired look. How cute are these cabinet knobs!
I also reused a small shelf we already had, painting it in Rust-Oleum’s “Warm Caramel” for added storage above the cabinets.
After: The Big Reveal – Say Hello to the Mini Mudroom!
The final result is a cohesive, functional mini mudroom that meets all our needs. It’s perfect for storing coats, shoes, and other everyday items, all while adding style to the garage. Using Rust-Oleum products helped tie the project together beautifully, and I love how the warm wood tones and earthy cabinet color complement each other. Make sure you check out Rust-Oleum’s color watch 2025!
Shop the Project
Here’s a list of everything I used to create this space:
Note: If you buy something through our links, we may earn an affiliate commission or have a sponsored relationship with the brand, at no cost to you. We recommend only products we genuinely like. Thank you so much.
DIY Cornhole Set
Today you guys are coming along with me as I customize and build a DIY Cornhole Set. We spend a lot of time in our backyard and I thought this would be a quick, easy, and fulfilling project to make that space even more enjoyable. Plus, I always love the chance to add squiggles to any design project I take on, and this was no exception. Let’s get into it.
The 4×4 piece of plywood actually didn’t fit in my car, so they kindly cut it down for me. Top-notch customer service!
Plan the Design for Your DIY Cornhole Set
After gathering all my supplies I headed back home and drew up a simple design.
I wanted to prioritize getting all of my pieces cut and sanded, that way I could do all of the DIY Cornhole Set assembly at once.
Prep the Wood
My plywood had a few nicks and divots, and I wanted to get those filled with plastic wood and sand them down so the beanbags wouldn’t get stuck on them.
Ah, much better!
Cut the Wood Pieces
Here I’m cutting down all of the 2x4s for assembling the base of the cornhole set. I made four 45-inch pieces, four 24-inch pieces, and then four 13-inch pieces with a 30-degree angle and a rounded side.
To make a rounded edge, I simply traced something round (in this case, my roll of painter’s tape), cut it off with the jigsaw, then sanded the edges down.
Add Pocket Holes
Now we’re ready to add pocket holes which we’ll use to connect all the base framing together. Notice my fogged up glasses in this picture..haha. It was 100+ degrees outside when I did this project. Phew!
I decided I wanted to use pocket holes for this build just so it would look a little bit cleaner, but if you don’t have a pocket hole jig, it would be very easy to just toenail the boards together.
Begin Assembling the Base
In my opinion, assembly is the most exciting part of any project. You finally get to see your vision coming together!
Putting the corners together might be a little tricky; you want to make sure you’re getting that perfect 90-degree angle. I used a combination of clamps and a speed square to ensure everything was looking good.
Attach the Legs to the Base
To attach the legs to the base of the DIY Cornhole Board, I first had to find the center of the 2×4 and drill a hole that would be big enough for my lag bolt.
Then I used a piece of scrap wood that was about 1 inch to line it up on the existing frame and drill another hole through the hole I had already created so they lined up perfectly.
Attach the Top to the Base + Finalize the Design
If you know anything about Perkins on Parkway, it’s that we love squiggles! My son got so excited when he saw me building this and he really wanted to do stripes. So I thought…why not bring the two designs together? I remember helping my dad with projects like this when I was a kid, so it’s really special to me that now my son gets to help me while I build.
With the frame built and the legs attached, it’s time to attach the top sheet of plywood. I’m attaching it using the pocket holes I previously drilled so everything is nice and fitted.
Drill the Hole
Now it’s really starting to look like a cornhole set. Let’s drill the hole for the beanbag! I knew the easiest way to do this would be to use this bi-metal 6-inch bit. This was my first time ever using one of these and it wasn’t that hard, so I was pleasantly surprised.
Prep the Wood for Painting
I sanded both cornhole boards and wiped them down with a tack cloth before painting.
I used a pencil to sketch out my giant squiggle on the bottom knowing I would have the stripes coming out of it. I thought it would be a really fun graphic look.
Now for the stripes…I love natural wood, so instead of painting the top, I thought it would be fun to do the stripes in a stain! The stain does bleed through the tape just a little bit, but I feel like it gives it a nice watercolor effect.
Seal the DIY Cornhole Set
Because I used stain and this is going to live outdoors, I needed to seal my DIY Cornhole Set with Polycrylic. I did 3 layers, but you could as many as 6 or 7.
I added a handle on the side of each cornhole board since I’ll be hauling these in and out of my garage, and a handle makes it super easy.
Now Your DIY Cornhole Set Are All Done!
I’m so happy with how these turned out and that my son and I got to design it together.
Note: If you buy something through our links, we may earn an affiliate commission or have a sponsored relationship with the brand, at no cost to you. We recommend only products we genuinely like. Thank you so much.
Looking for more DIY ideas to make your backyard a nicer place to hang out? Check out my Patio Deck Tile Upgrade post!
DIY Squiggle Cord Sconce: Fun and Function
A polished and put-together room can come with a big price tag. For our guest bedroom, we wanted to avoid that at all costs. We tackled design obstacles, one after another, and each turned out beautifully. My personal favorite? The DIY squiggle cord sconce.
The squiggle cord is really a success story that started from a place of frugality. We wanted the light source in this room to be a design feature, so deciding on a sconce vs. lamp was fairly easy. That’s when things started to get tricky. I found these beautiful plug-in sconces from CB2 (sorry they are no longer available, but I will link some others I would have totally used) and fell in love with the look, just not the dangling chord. For a minute, I briefly considered finding a rechargeable option like I’ve used in my home elsewhere but then thought of how frequently they would get used, and that just didn’t make sense. Then I looked into cord covers, painting the cord, and even the cost of hardwiring and none were doing it for me. That’s when it hit me, what if I just viewed the cord as an extension of the fixture itself and had fun with it?
When trying to imagine what I wanted the end product to look like, I kept coming back to words like playful, laid back, and comfortable. I realized I was overthinking it. I LOVE squiggles (shout out to the Squiggle Squad) and that’s exactly what this room needed.
Squiggle Cord How To:
Lay out the design you want to recreate on the floor prior to hanging your sconce. Make sure there is enough cord to get from the sconce to the plug in the wall.
Install the sconce and let the cord hang loose.
Use heavy-duty double-sided mounting tape to adhere the cord to the wall at all the points where you want the cord to turn or curve. Cut the tape super small so it adheres to the back of the cord but isn’t visible from the front. Follow the curve of the cord as you try to bend it.
For my specific sconce there was also a button I hot glued next to the headboard for easy access. I wanted it to be more secure because guests would be using this often to turn the light on or off.
This project was done over a year ago and it’s still holding up strong! The best part–I got the design feature I was looking for and it probably took me 30 minutes total to do both. I love how they turned out and I think our guests do too!
Let this be the testament that sometimes the solutions are often much more simple than you think and to trust your gut; you will think of something special!
Note: If you buy something through our links, we may earn an affiliate commission or have a sponsored relationship with the brand at no cost to you. We recommend only products we genuinely like. Thank you so much.
Skincare Routine for Acne Prone Skin
Heading into the new year, I’ve been feeling totally unmotivated, lacking creativity, and still not feeling my best. But I’m finding little ways of finding joy and motivation in my day that are helping me get back on track. This girl is getting ORGANIZED (did you see my closet series?!), finding new ways to spark CREATIVITY, and figuring out what this next year holds. I have seriously acne prone skin and was finding that my skin was looking the way I felt on the inside, so I decided to tackle a skincare routine for acne prone skin that would work!
I swapped out and simplified a few products in my skincare routine and my skin has been feeling so much happier. Don’t know about you, but feeling good PHYSICALLY makes all the difference in determining how my day will go. Having acne in my 30s… well lets just say I never thought I would be here.
I think that having a quality skincare routine is incredibly important, but I want it to be quick, easy, and affordable. So here’s a list of skincare products from Amazon that I’m loving and that help ME start my morning off right, or finish off the day feeling refreshed and ready for bed:
Skincare for Acne AM Routine:
Cleanser
The first thing you’ll find in my medicine cabinet is the Cerave Hydrating Facial Cleanser. I use this stuff daily, and won’t go without it. I’m definitely more acne prone, so this cleanser is super simple and gentle for my sensitive skin. It contains hyaluronic acid, ceramides, and glycerin to help hydrate skin without stripping moisture (this makes my dry skin so happy!)
When I’m not using Cerave, I use the Botanic Tree Glycolic Acid Exfoliating Face Cleanser (2-3x per week). This cleanser is giving me LIFE and is a little step up from the super simple Cerave cleanser. My sensitive skin is smooth, clear, and happy when using this product. It helps with dark circles, acne, excess oil…all the things.
Don’t forget to pair the cleanser with my favorite Clean Skin Club disposable face towels. It’s pointless to cleanse your face and dry it with a dirty towel. Using these disposable towels helps ensure you’re avoiding the bacteria that can often be on your standard towels if you don’t wash them after each use. These towels are also chemical-free and UNSCENTED, an added bonus! A great option for removing makeup in the evening as well.
Moisturizer
After cleansing, you HAVE TO moisturize! And something I need in my daily moisturizer is SPF because I’m trying to avoid those sunspots and have happy skin as I age! I use the Origins Mega-Bright SPF 30 Oil-Free Moisturizer daily. This stuff is a dream for reducing redness, evening skin tone, and protecting your skin from the sun (a must for this Texas girl). *HOT TIP* Don’t forget to use this on your neck as well! You’ll thank me later.
Light Therapy
I’ve been finishing up my AM skincare routine with a new product that I’m LOVING. The CurrentBody Red Light Therapy face mask! I have started using this every other day in the morning after washing my face, and the results are SO GOOD. I have seen a huge change in the overall texture of my skin, and it has decreased the healing time for my acne significantly. You won’t catch me without this product moving forward! If you want to try it for yourself, use code PERKINSCB for 15% off today! Aff Link – https://go.shopmy.us/p-3229733
PM Routine:
Cleansing Wipes
I start off my evening routine by scrubbing away my makeup from the day! A favorite makeup remover that I have in rotation is the Cica Korean Facial Wipes. These are a cleanser and makeup remover in one with a little bit of gentle exfoliation! These make for a super quick and easy skincare routine, which is what I’m looking for. I love using these for a quick refresh after I go to the gym or on a walk outside.
Moisturizing Cream
For evening hydration, let me tell you, what I was using before this product was…PRICEY. And the options are endless. So I did the search for you and found a holy grail product. The DermaCalm SOS Therapy moisturizing cream has changed the game for the extremely dry skin I deal with through the winter months, and the price can’t be beat. This stuff is great for itchy, dry skin, and even eczema.
Don’t skip out on these products!
Optional (But Luxe) Products
Want to add a few extra steps to your skincare routine that make it feel like a whole DIY SPA EXPERIENCE? Here are a few of my favorite products that I only use a few times a week when I need a little extra skincare boost:
The Clarins Cryo-Flash Mask is everything. I cut the cord with Botox and am always looking for other ways of keeping my skin feeling tight and lifted. This mask has a gel-cream consistency and is icy cold. It shrinks my pores, makes my skin feel super moisturized, and gives it the plump and lifted appearance I’m looking for.
After weeks of feeling sick and run-down, the Peter Thomas Roth Cucumber De-Tox Hydra-Gel Eye Patches have been a lifesaver. I wear them around the house in the morning, giving them the time to do their magic. They are refreshing and get rid of the puffy eyes and dark circles that feel inevitable some days.
Every few days, I like to add a serum into my routine in the morning after cleansing. The SkinCeuticals Vitamin C Serum is a go-to for me! It combats fine lines and wrinkles, brightens your complexion, and has mega anti-aging benefits you won’t want to miss out on.
For my friends with hormonal acne, I GOT YOU. Another great SkinCeuticals product that helps fight my hormonal acne is the Glycolic Acid Cream. It promotes cell turnover which is a must for addressing acne, and it also addresses skin discoloration and aging. I love this stuff. Use this product after cleansing and before moisturizing!
Collagen Mask
Last but certainly not least is the Stylia V-Line Lifting Hydrogel Collagen Mask. This product helps to contour and shape your chin, giving it the little extra lift I need. It refreshes my skin and is super comfortable to wear. It really does it all.
Incorporating this skincare routine for acne into my day has helped me feel like a human again! It sets me up for success when I have a big day of projects ahead, and all these products are on re-order in my Amazon cart. I won’t go without them!
DIY built-in desk nook | From closet to cozy workspace
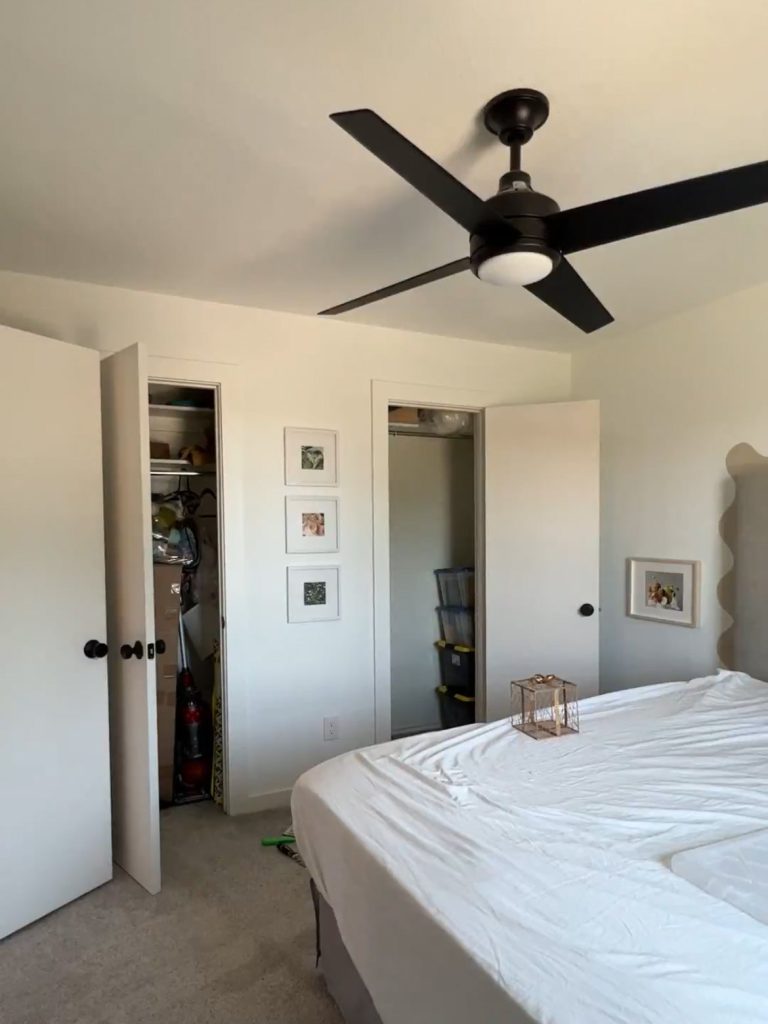
Starting a project can be easy, but the real challenge is finishing it. Who can relate?! In the summer of 2022, I decided to replace all of the flooring upstairs. My lovely sister gave me a hand with the project and while we were tearing out the gross outdated carpet, my sister had the idea to turn a part of the guest room closet into a DIY built in desk nook. Game changer.
It was kind of a now-or-never situation so we sprung into action because it wouldn’t make sense if we didn’t demo out the closet before we laid the new flooring down. We finished the entire guest room, except the desk nook, and were finally able to circle back to it during the summer of 2023. Fast forward a year later (oops), and we finally have a cozy and cool desk nook!
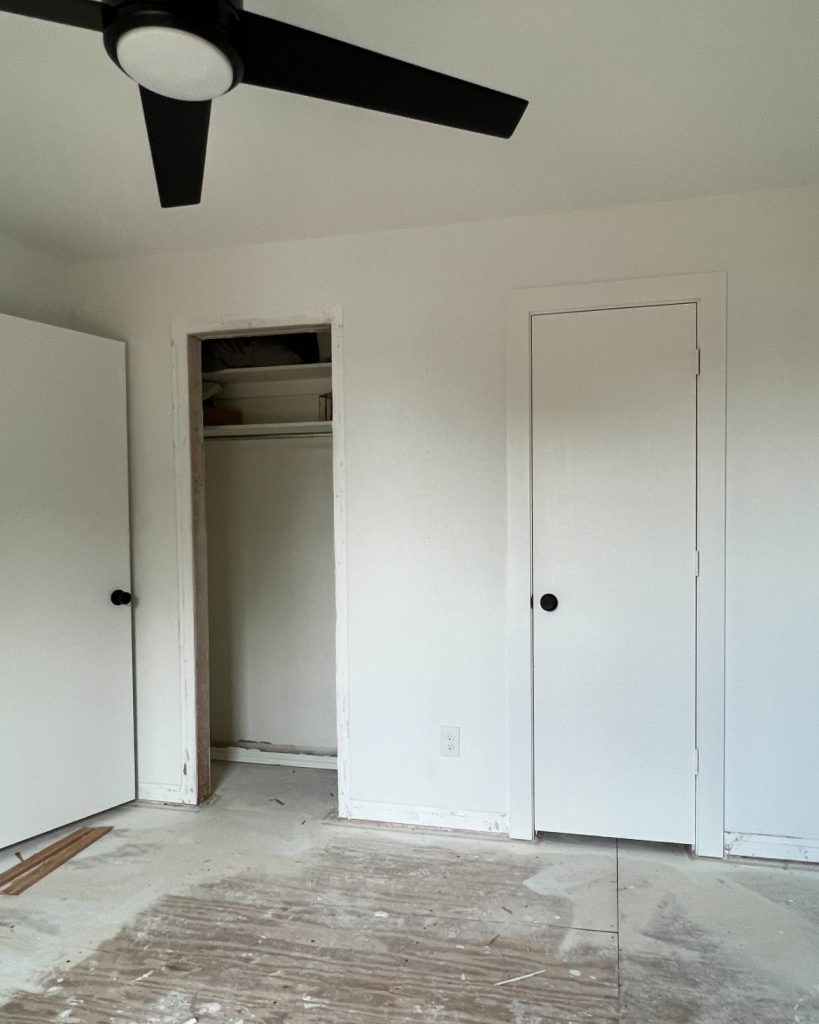
DIY Desk Nook: The Before
A little bit of background: this bedroom had a massive closet. Although we love having guests (especially my mother-in-law, she primarily uses it), no one needs that much closet space! That made the decision to add a desk nook even easier. I do credit this labor of love to be the kickoff to my color era. Here is how it all went down:
Step One: Demo
Tearing out the closet felt so surreal, most people dream of having this extra storage space, but for us in this room, it just didn’t make sense. We had already brought the new flooring into the closet intending to utilize this space better. We even figured out how to do it without needing a transition piece (but that’s a story for another time).
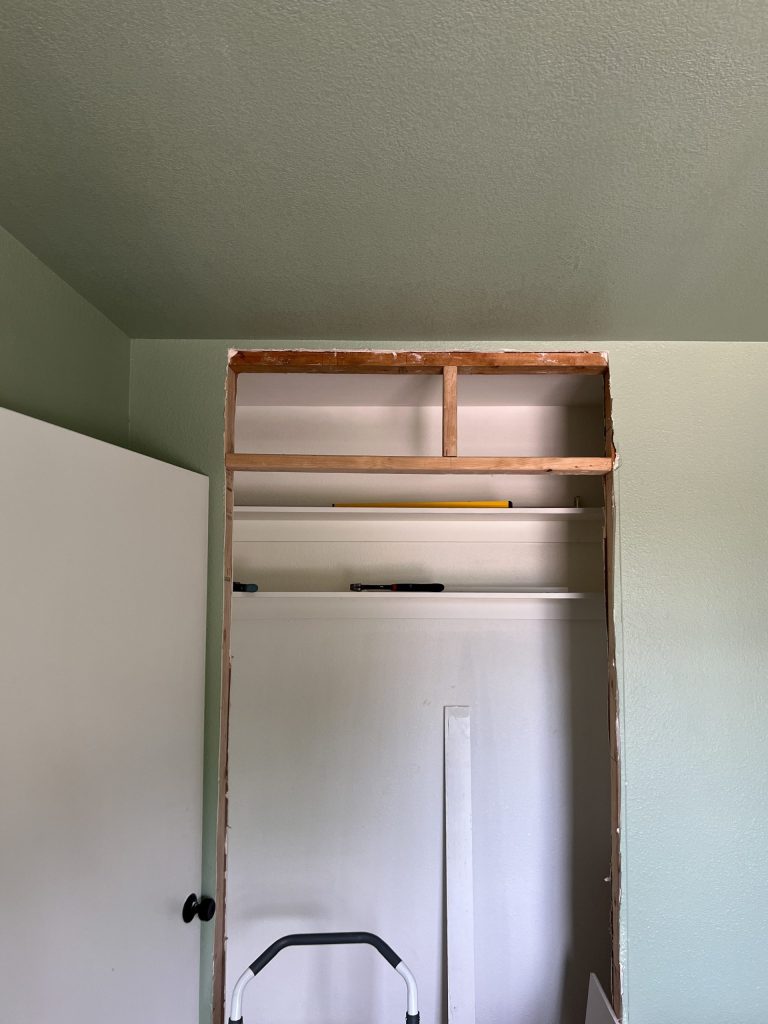
The first swing was at the drywall surrounding the closet opening. I was very intentional about how I took the drywall out, I knew I would need to get 2x4s in the wall to create a clean frame.
After tearing down the drywall, let it sit, untouched, for a year! JUST KIDDING! But if this happens to you, know I’m right there with ya.
Step Two: Frame
From the demo, you’re left with a frameless opening for your soon-to-be built in desk nook. Cut down 2x4s to fit in the opening between the walls to create a frame. I used my favorite kreg jig pocket hole tool. The holes create the perfect angle to screw into the existing framing, hence why it’s my favorite tool!
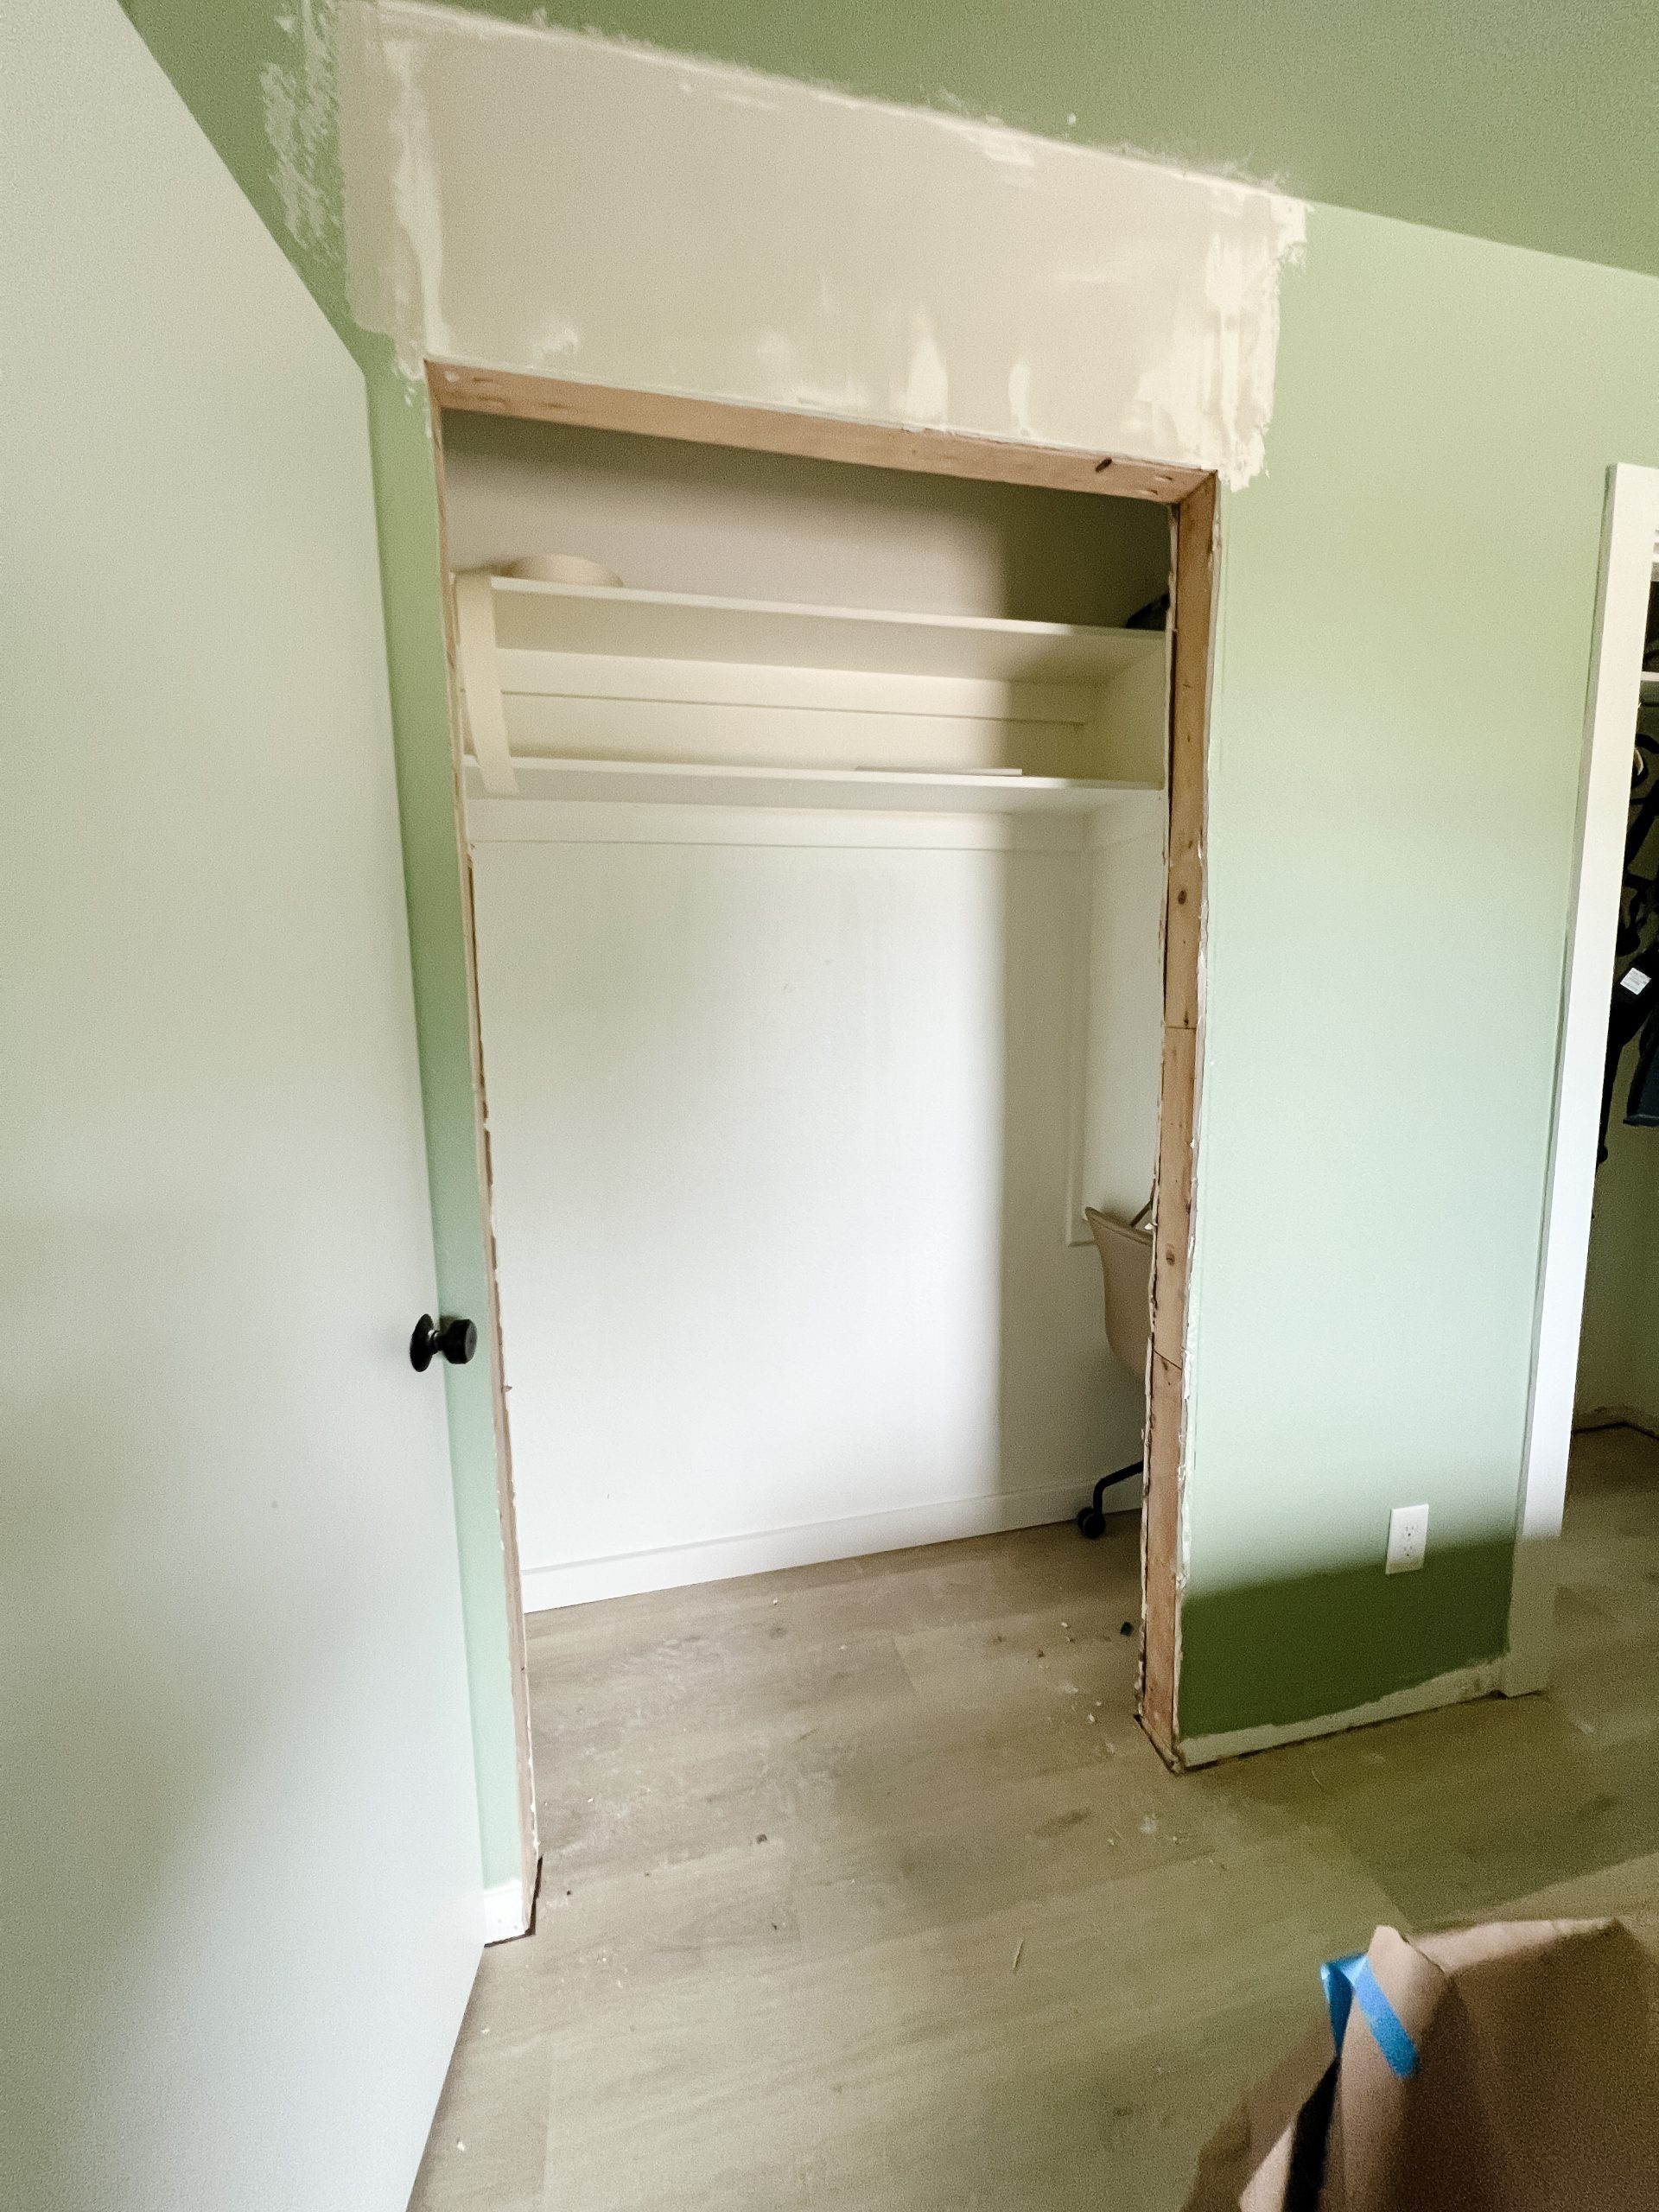
Once the frame is in, it’s time to add a header. I framed out the opening to the height that I wanted with some 2x4s. After some internal debate, I decided to match the frame size to the other door on the wall, although I’m convinced either would’ve looked great. Then it was time to drywall. I bought two patch drywall pieces from Home Depot and cut them down to size and I used premixed joint compound and drywall tape.
After I got the drywall up then it was time for one of my most dreaded steps: mudding. After successfully getting two coats on, dried, and sanded, it was time to spray wall texture over it to match the ceiling for a seamless look. Once that is dried to your desired look, get the roller ready and start painting! The paint will need to be completely dry before we put up the trim pieces.
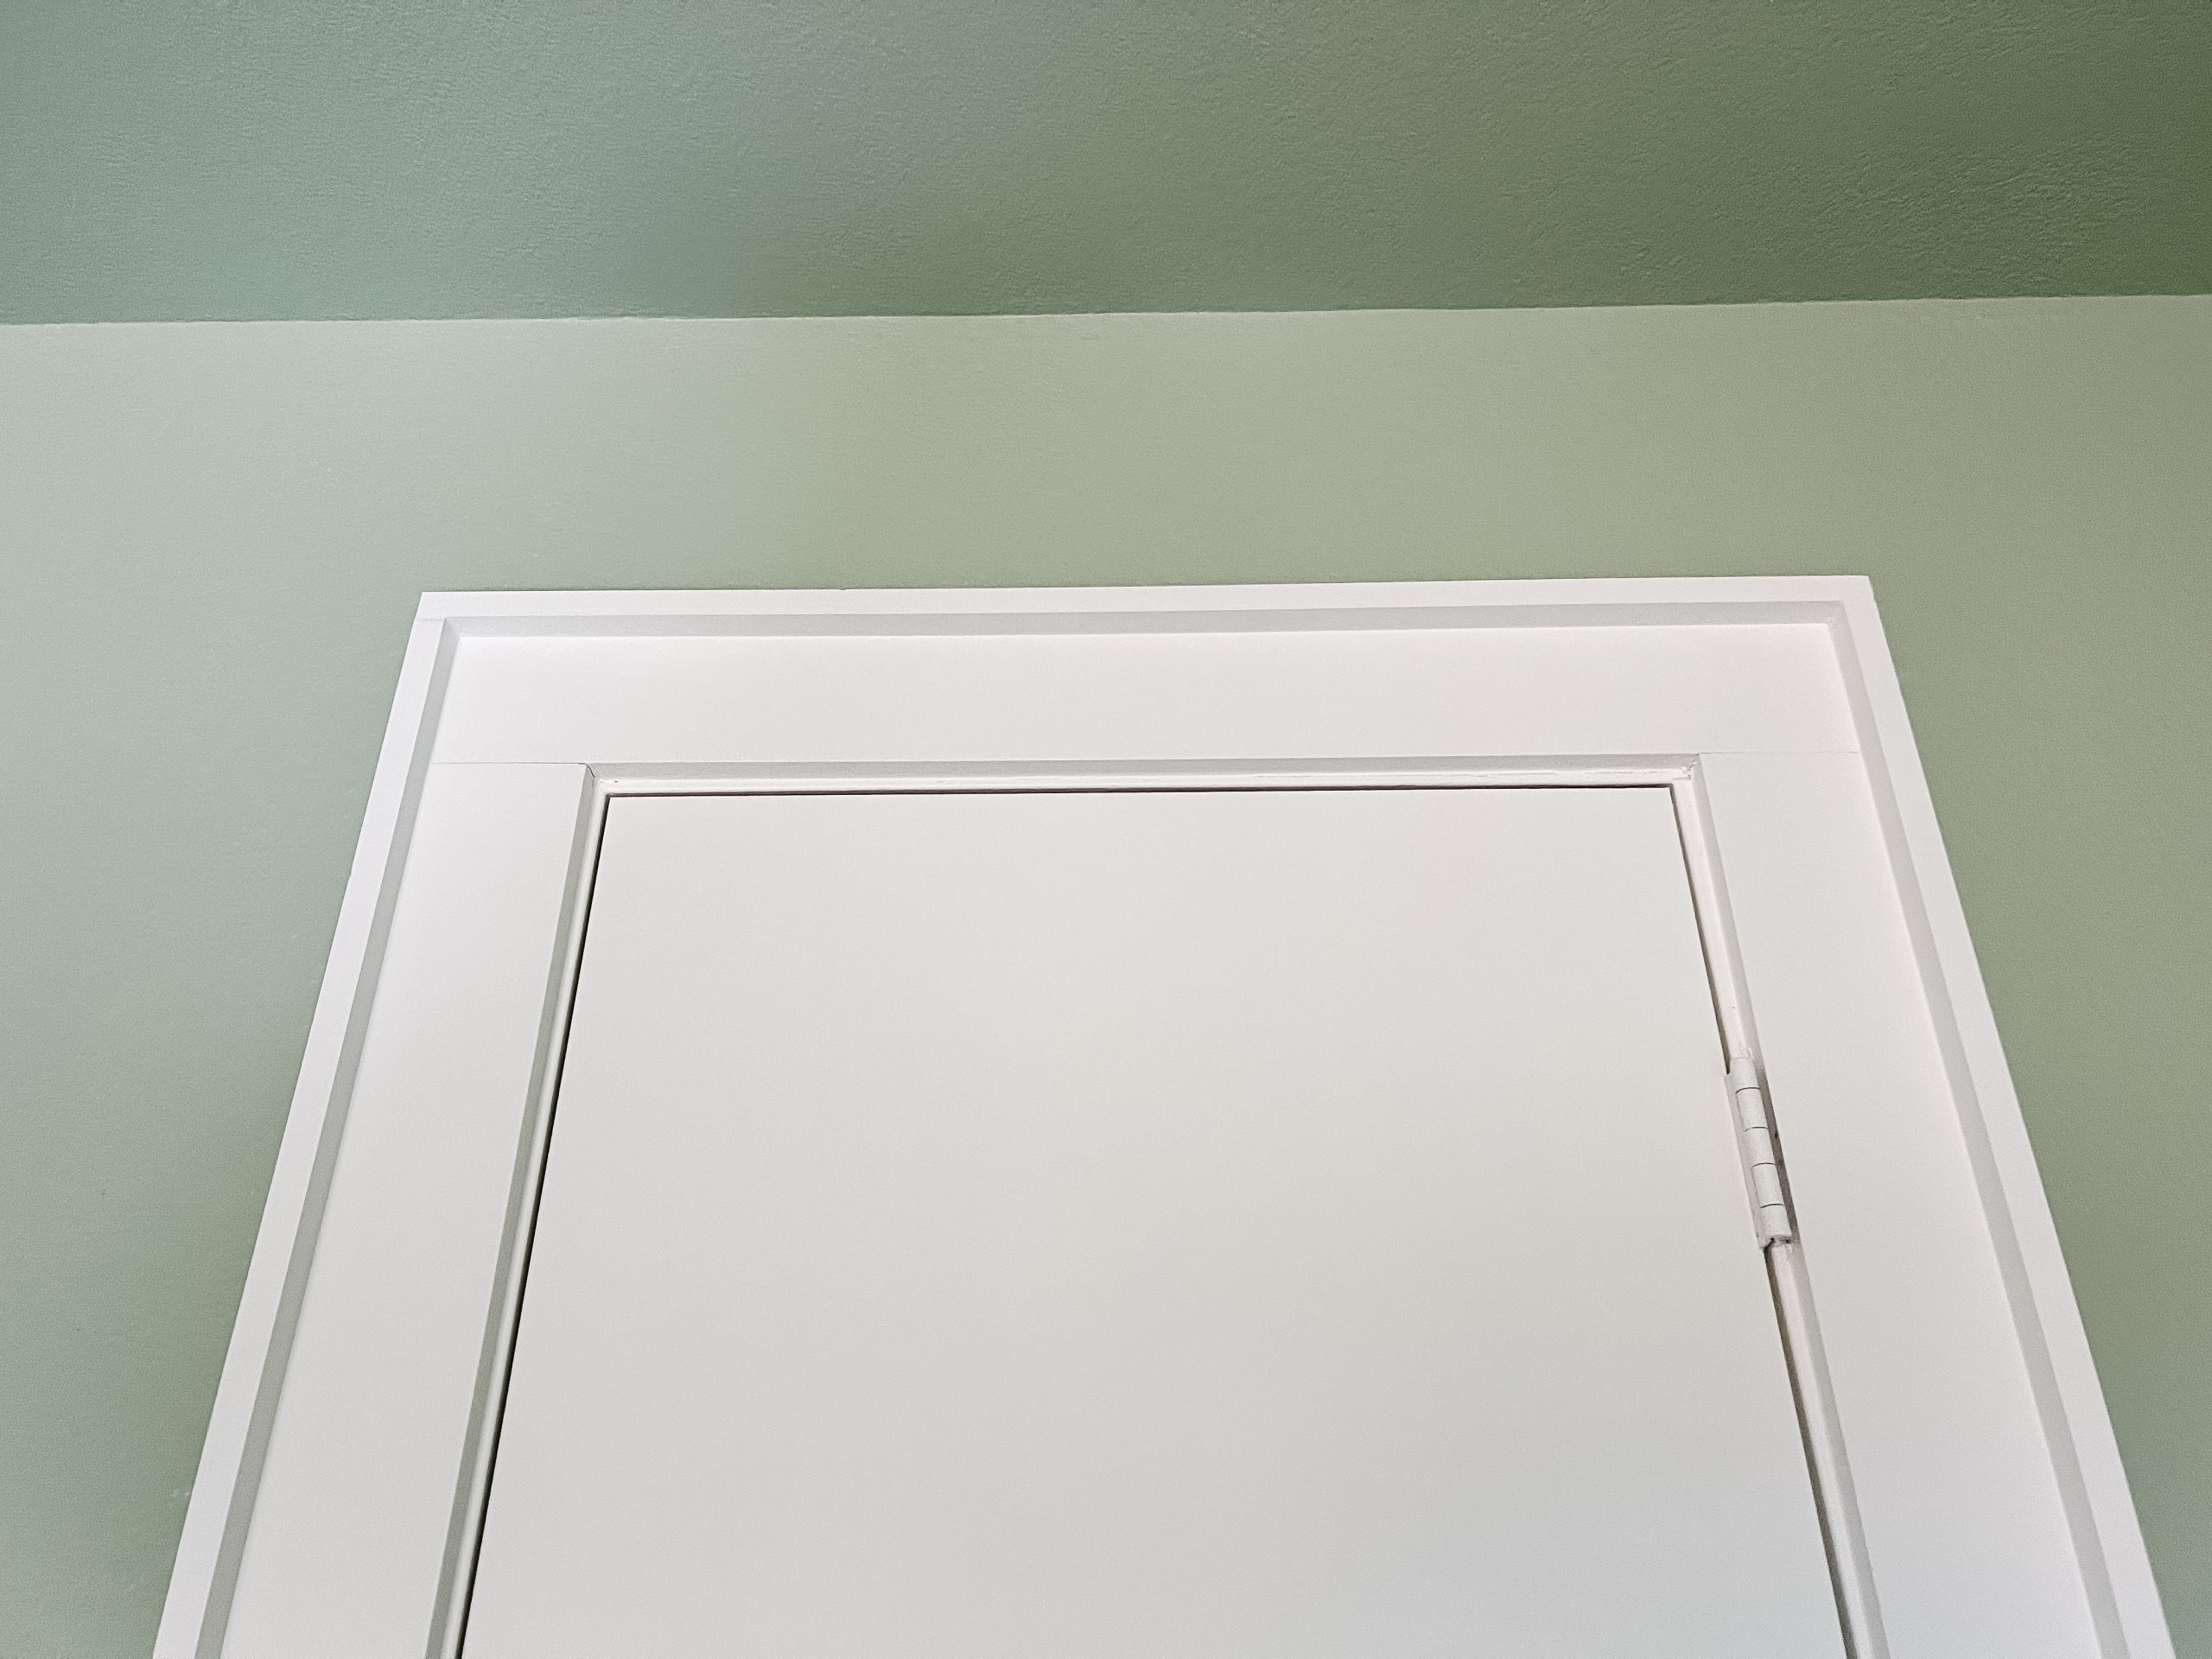
Next, I added the trim and baseboards. For the trim, we decided to bring the downstairs style upstairs. Which only meant we added one more trim piece to the frame for a more detailed look. I went around the room and added the same style on all the doorframes to make it look cohesive. It added more work, sure, but it’s the first step in getting the trim in the whole house to match.
Now for the baseboards: since this is a closet and will be mostly hidden by the desk, I opted for a butt joint instead of my preferred scarf joint. Don’t worry, I will be doing a scarf joint in the rest of the room!
*We will have to frame around the desk as well, but obviously, at this point, there is not a desk to frame around! Check out how I went about this in step four!
STEP 3: Details
When I stepped back and admired the fully framed nook, I realized a few details had been overlooked, but none that can’t be fixed!
First, I noticed that the shelves (that I left up from the original closet), looked a bit too thin compared to the new trim. Working smarter, not harder, I attached these fun, squiggly pieces of wood used in roofing to the existing shelves for some visual interest! I know these aren’t for everyone, but are you a part of the Squiggle Squad? I simply attached these with a brad nailer and then filled in the gap with plastic wood and sanded it down flush.
Second, I realized that it is pretty helpful to have an outlet by a desk (duh). There wasn’t an existing outlet in the closet, so we had an electrician come in and add one. We will then use one of these desk clamps to make the outlets easy to access from the desk!
We have shelf trim and electrical, now it’s time to paint. I knew I wanted a bold blue, but perfecting the shade took some time.
*Note: This picture was taken before the shelf trim going in
Once the perfect blue was selected – stay tuned – it was time to get priming! I grabbed my Handy Paint Pail (IYKYK) and got to work!
STEP Four: The Built-In Desk
We have a beautiful blue nook, but now it’s time to add the desk! I started with the framing for the desktop. A laser level makes this 10x easier!
Using pocket holes, screws, and wood glue, I added the braces to the frame.
Next, it’s time to work on the desktop! I used plywood, sanded it down so it was smooth, then gave it a good wipe-down to prep for the stain. I used a microfiber cloth, which worked like a charm–a tack cloth would do the trick as well!
Once the plywood is sanded and cleaned, it’s time to start staining! If you’ve been following me for a while, you may have noticed Simply White by Minwax USA is my favorite. So to no one’s surprise, that is the color I went for with this project!
SAFETY REMINDER: Once you’re done with a stain rag, soak it in a bucket of water. Then, wring out the rag and allow it to dry flat, preferably outside. The key is to keep anything from smothering the rag as it dries since it releases heat as it dries and could start a fire!
I stained a smaller piece of wood that will be used for the front of the desk.
Now that the desktop and front are stained, I applied a couple of coats of Polyurethane. The Handy Paint Pail cup is perfect for smaller jobs like this! I would do at least 5 coats.
Next, I brought the top and front of the desk upstairs and placed it on the frame. To secure it, I used this genius way to fill in the nail holes (thanks to Abby Road Home)! You lay painter’s tape and shoot brad nails through it, then apply wood filler. Then you can remove the tape and you won’t know there was ever a nail hole there! If the color doesn’t match perfectly, don’t worry, you can always go over it with another wood-fill color. Either way, once the holes are filled, lightly sand them down.
The desk is in, filled, and looking great! I wanted to clean up the inside of the opening a bit and add trim, just to cover up the exposed drywall, so I added just a simple piece of white trim to match the front of the nook.
Don’t you love how the trim makes the desk look super built-in?
From there, I caulked around the trim and where the desk meets the walls. Once the caulk dried, it was time to touch up all the blue paint! Some of it got a little beat up when we were putting the desktop in. Easy fix!
The secret to extra crispy paint lines is caulk! Tape off the area, lay down a bead of 20-minute drying caulk, then let it dry for 10-15 minutes. Paint over it, let the paint dry, then voila! Crispy line.
STEP FIVE: STYLING THE BUILT-IN DESK NOOK
DIY-ing a built-in desk has been so rewarding! Now it’s time to take it to the finish line! Styling is one of my favorite parts of any project.
First up: Install the light and art.
I found this rechargeable picture light on Amazon and knew it would be perfect here! The beautiful artwork is by one of my favorite artists Figure Form. You can find the BlueBird print here.
Next, I decided to stain a picture frame to perfectly match the desk. The contrast against the blue walls makes me so happy! Especially because the art I chose for this area has a bold blue in it as well.
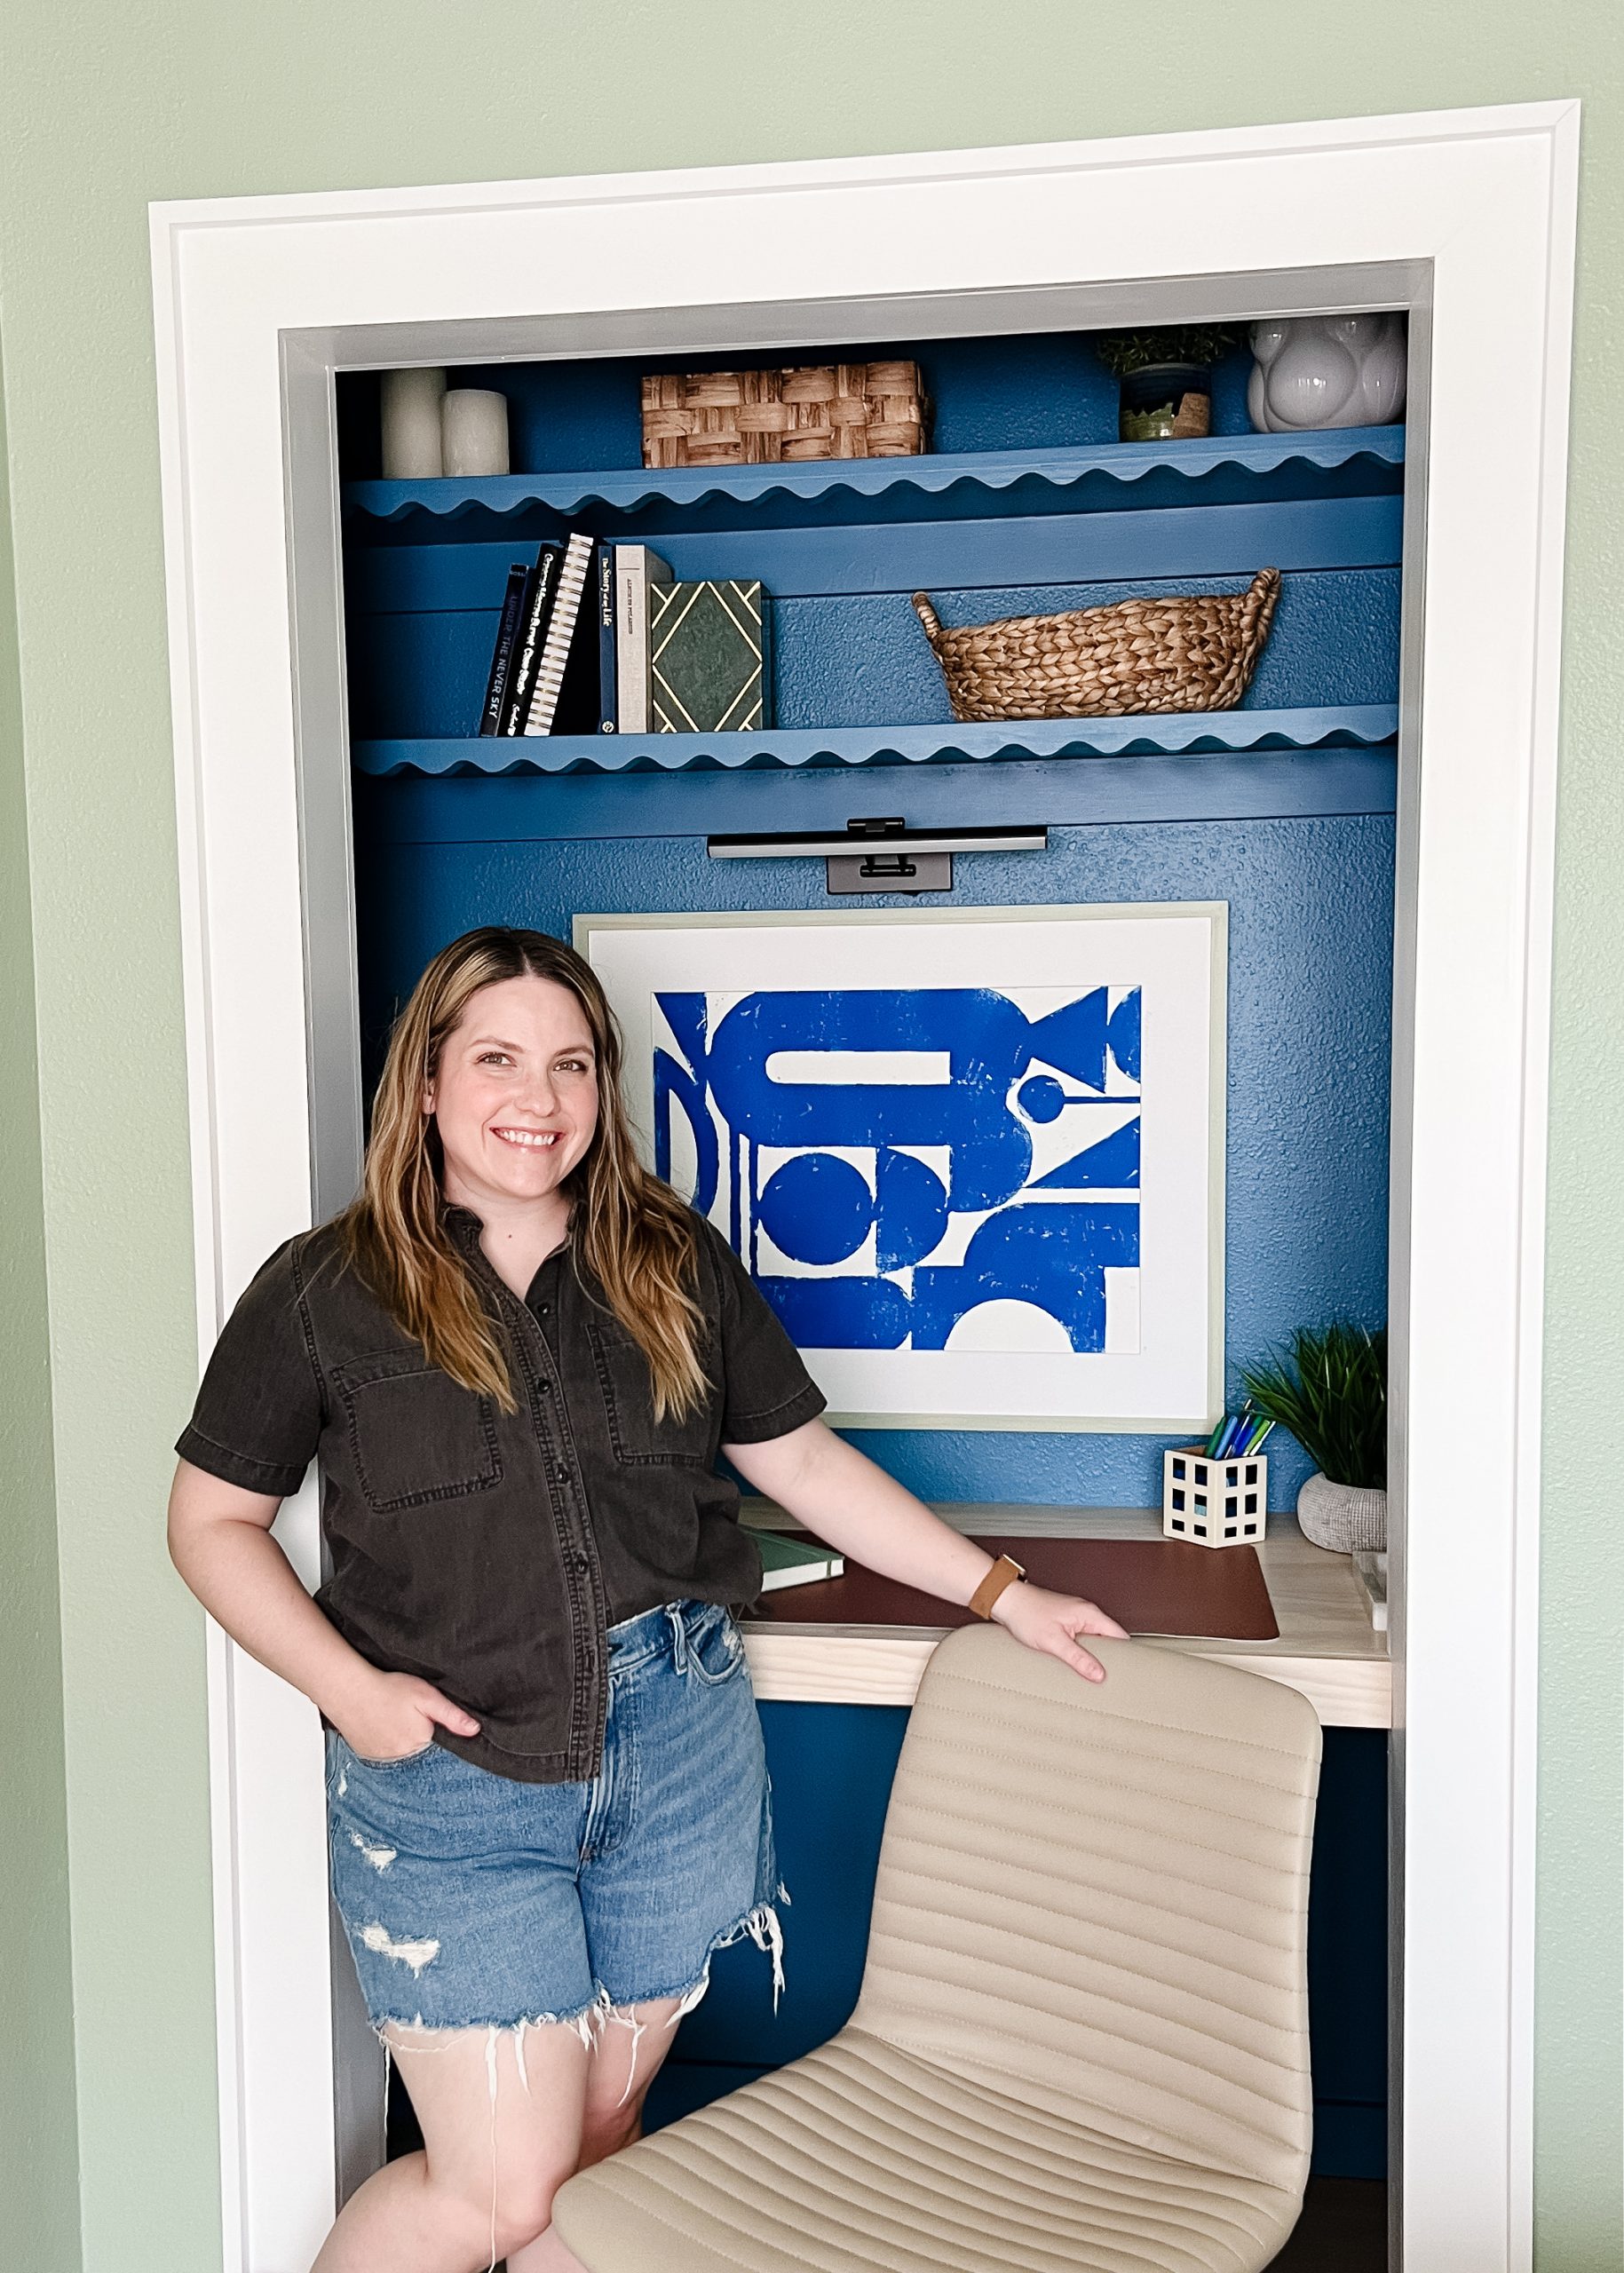
Lastly, I added cute office supplies to the shelf, and BOOM! We no longer have a MASSIVE closet; instead, we have a cute and functional desk nook for our guests to use!
I really loved how this turned out and even though it may feel like a “small” project, it feels so big to me! It combined so many of my favorite aspects of DIY and allowed me to be creative and push myself in the direction I want to see my home go in.
If you need a sign to push yourself, this is it! You can create the home you’ve always dreamed of. You can take risks, remember DIY is never permanent!
I hope you love this DIY Desk Nook as much as I do.
Note: If you buy something through our links, we may earn an affiliate commission or have a sponsored relationship with the brand, at no cost to you. We recommend only products we genuinely like. Thank you so much.
How to make a wooden Christmas garland
When I walked into the Dollar Tree and saw these wooden trees and snowmen I knew I had to make something with them! A festive winter wooden Christmas garland immediately came to mind. Last year during the fall I made a mushroom wooden bead garland and it turned so cute. I love incorporating wood decorations into my holiday decor and bringing more nature inside. I’m very inspired by Scandinavian design and they love their wood elements. My garland consisted of all trees while my mom decided to create a snowman version, both turned out so cute! This DIY is super beginner friendly, can easily be done in an afternoon or evening.
Supplies needed:
Wooden Trees – (exact were dollar tree, similar linked)
Optional – Drill (you can definitely complete this project without drilling the pilot hole, it will just take a little bit more elbow grease for the same effect.)
Create your own wooden Christmas Garland:
Decide how long you want your garland to be
Cut a piece of cord that length plus 2 additional feet. You will use this extra at the end to tie loops in order to hang the garland.
Lay out and plan your design
For my design I used 5 beads in-between each tree with a variation of sizing, but you can make up your own pattern. I like to lay everything out before I start to get an idea of how it is going to look at the end.
Drill a hole
Take all of the wooden trees and snowman that you need for your garland drill a small pilot hole. I used a 1/16 size bit and just when barely below the surface.
Screw the Hooks In
Take your screw eye hooks and twist them into the top of all the trees or snowman. The most success I found with this was starting with the eye hooks in the pliers and then moving the tree in a circular motion to attach. You are going to want to do this slowly to avoid breaking the screw eye. I had a couple snap off in the process and then just added another right next to it, which is not noticeable at all on the actual garland.
Gather all of the needed beads to create your garland.
I kept mine in a bowl to keep them from rolling everywhere.
Tie a loop knot.
Take one end of your cotton cord and tie an overhand loop knot to create a loop for hanging.
Start your garland by adding 1 tree or snowman.
To recreate my design you will use one 8mm bead, one 12 mm bead, one 20 mm bead, one 12 mm bead, one 8 mm bed in-between each tree or snowman.
Finish!
Once your garland has reached the desired length, tie another overland loop and you are done. You have made your very own DIY Wooden Christmas Garland, congrats!
If you want to see a video on this project… watch the reel here!
I hope you like this DIY! If you aren’t into mushrooms check out my wooden vase DIY that has gone viral many times over.
Note: If you buy something through our links, we may earn an affiliate commission or have a sponsored relationship with the brand, at no cost to you. We recommend only products we genuinely like. Thank you so much.