DIY built-in desk nook | From closet to cozy workspace
Starting a project can be easy, but the real challenge is finishing it. Who can relate?! In the summer of 2022, I decided to replace all of the flooring upstairs. My lovely sister gave me a hand with the project and while we were tearing out the gross outdated carpet, my sister had the idea to turn a part of the guest room closet into a DIY built in desk nook. Game changer.
It was kind of a now-or-never situation so we sprung into action because it wouldn’t make sense if we didn’t demo out the closet before we laid the new flooring down. We finished the entire guest room, except the desk nook, and were finally able to circle back to it during the summer of 2023. Fast forward a year later (oops), and we finally have a cozy and cool desk nook!
DIY Desk Nook: The Before
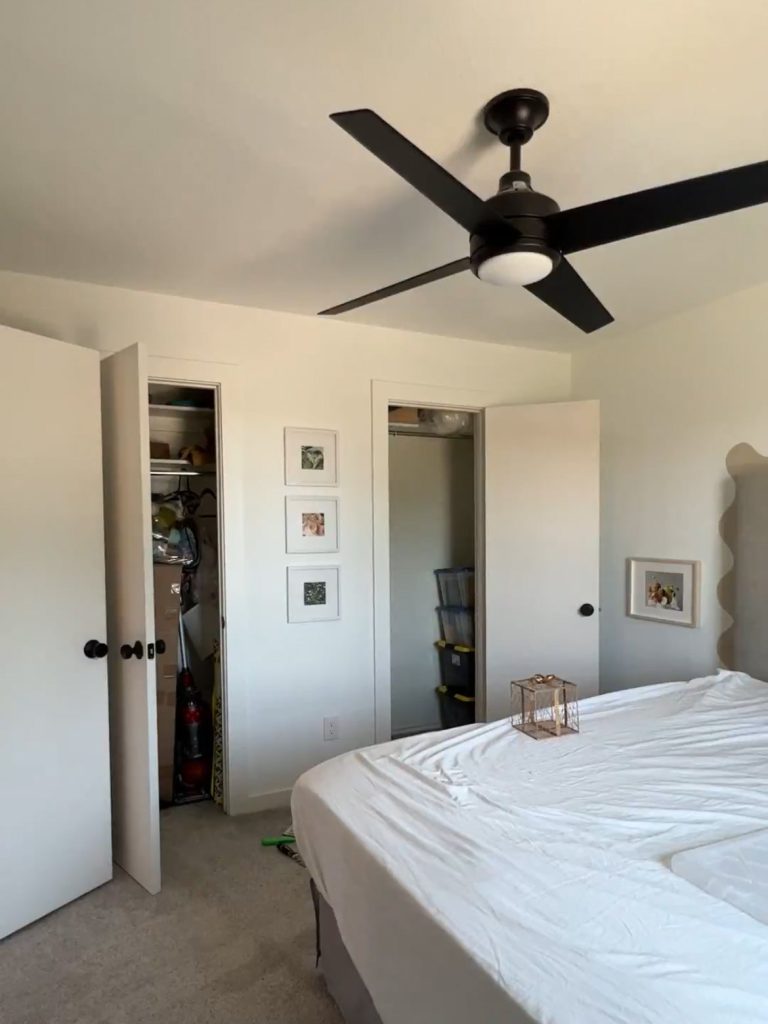
A little bit of background: this bedroom had a massive closet. Although we love having guests (especially my mother-in-law, she primarily uses it), no one needs that much closet space! That made the decision to add a desk nook even easier. I do credit this labor of love to be the kickoff to my color era. Here is how it all went down:
Step One: Demo
Tearing out the closet felt so surreal, most people dream of having this extra storage space, but for us in this room, it just didn’t make sense. We had already brought the new flooring into the closet intending to utilize this space better. We even figured out how to do it without needing a transition piece (but that’s a story for another time).
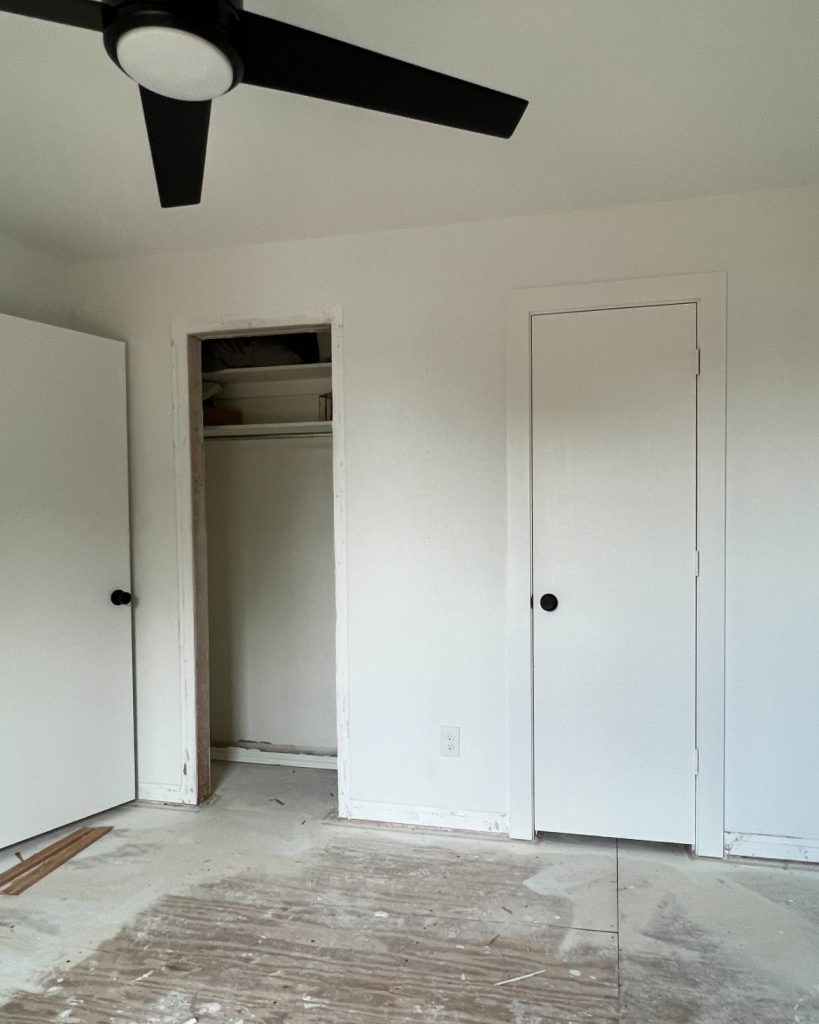

The first swing was at the drywall surrounding the closet opening. I was very intentional about how I took the drywall out, I knew I would need to get 2x4s in the wall to create a clean frame.
After tearing down the drywall, let it sit, untouched, for a year! JUST KIDDING! But if this happens to you, know I’m right there with ya.
Step Two: Frame
From the demo, you’re left with a frameless opening for your soon-to-be built in desk nook. Cut down 2x4s to fit in the opening between the walls to create a frame. I used my favorite kreg jig pocket hole tool. The holes create the perfect angle to screw into the existing framing, hence why it’s my favorite tool!

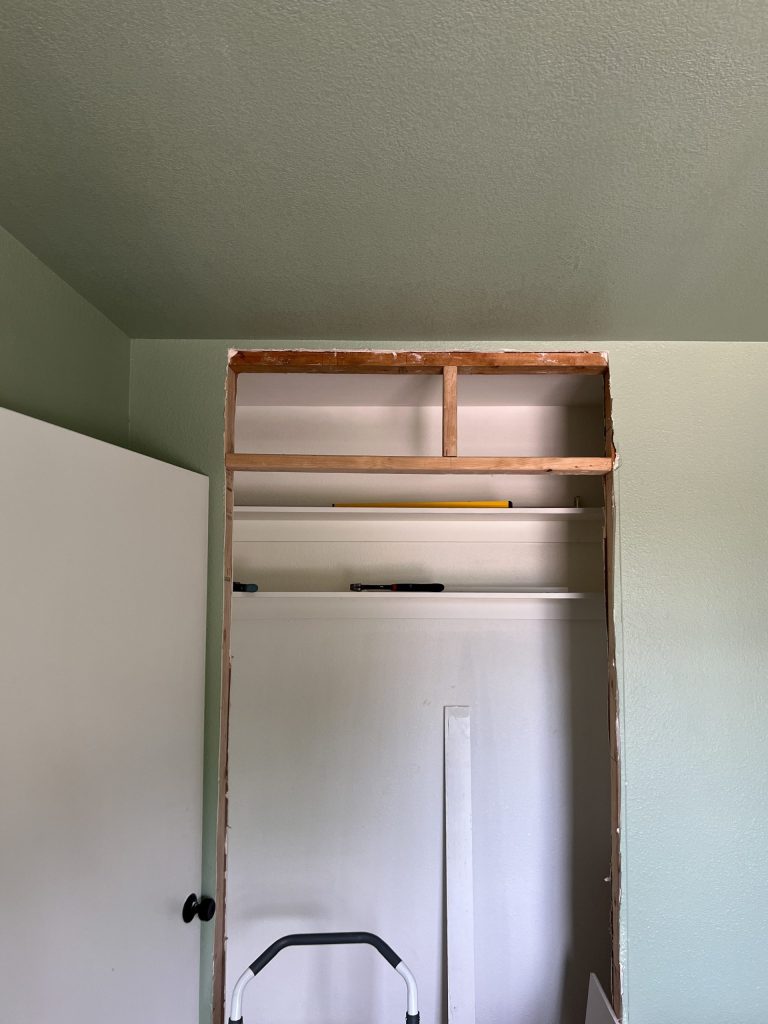
Once the frame is in, it’s time to add a header. I framed out the opening to the height that I wanted with some 2x4s. After some internal debate, I decided to match the frame size to the other door on the wall, although I’m convinced either would’ve looked great. Then it was time to drywall. I bought two patch drywall pieces from Home Depot and cut them down to size and I used premixed joint compound and drywall tape.

After I got the drywall up then it was time for one of my most dreaded steps: mudding. After successfully getting two coats on, dried, and sanded, it was time to spray wall texture over it to match the ceiling for a seamless look. Once that is dried to your desired look, get the roller ready and start painting! The paint will need to be completely dry before we put up the trim pieces.
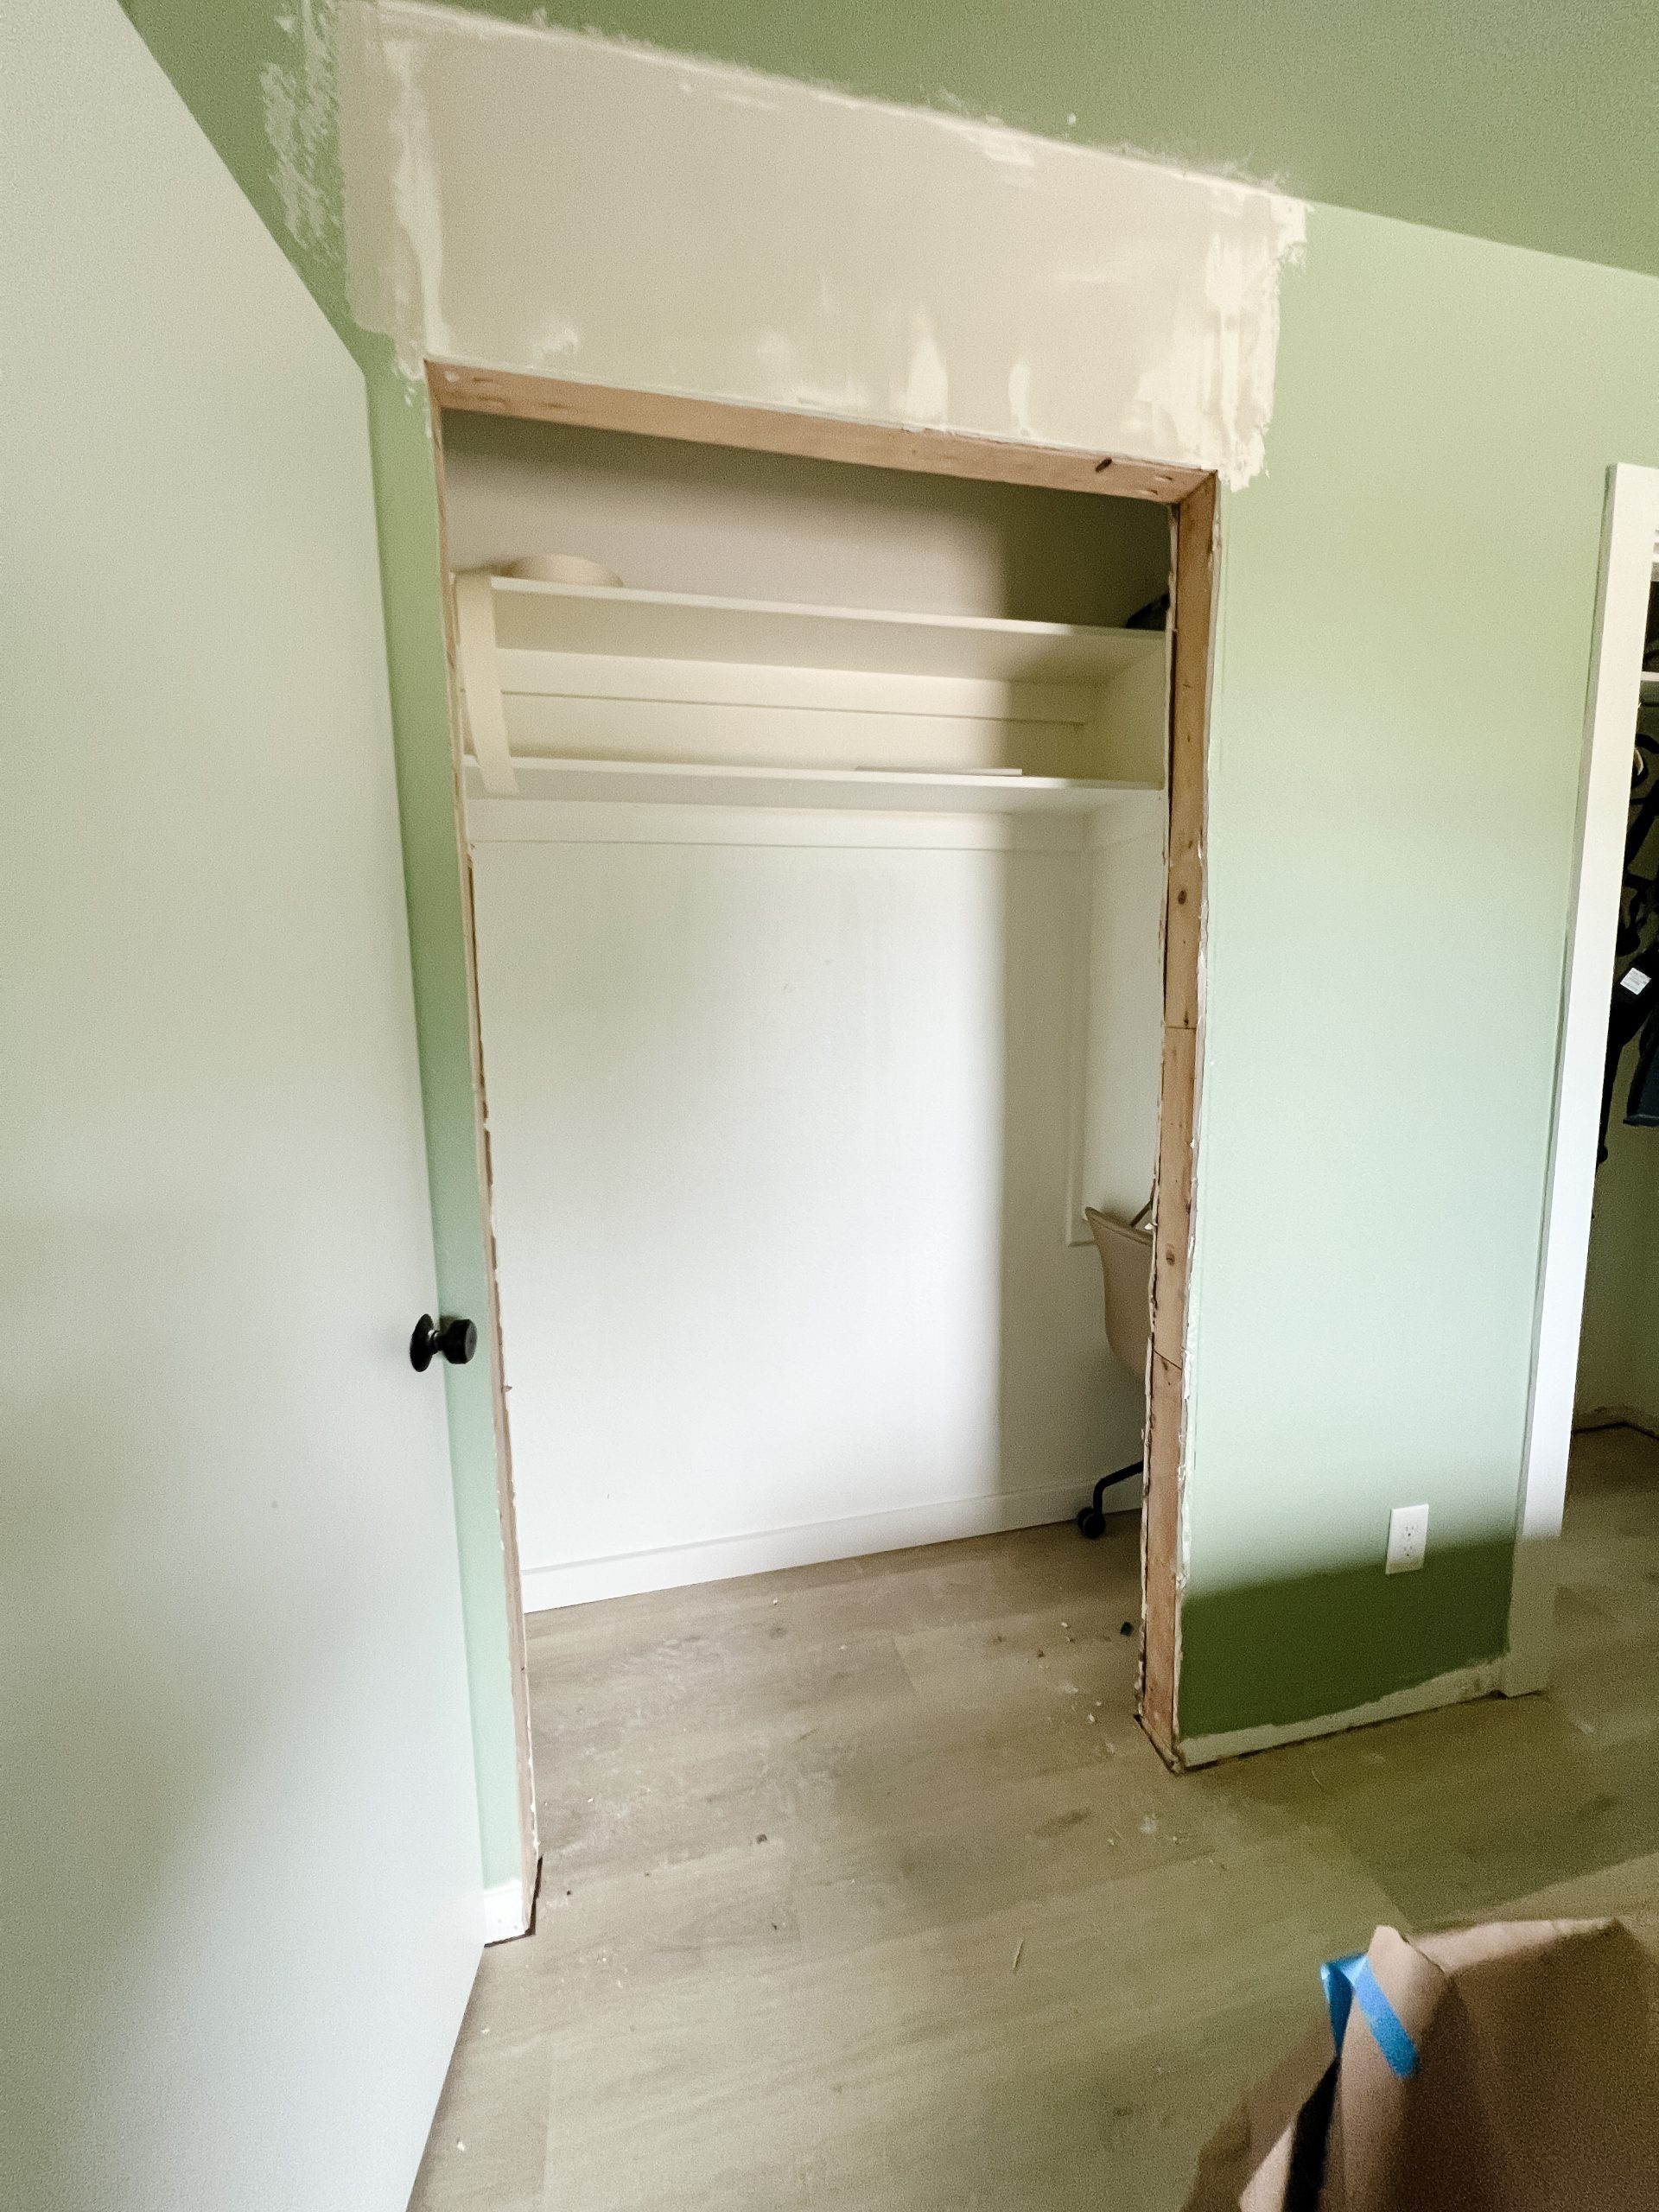
Next, I added the trim and baseboards. For the trim, we decided to bring the downstairs style upstairs. Which only meant we added one more trim piece to the frame for a more detailed look. I went around the room and added the same style on all the doorframes to make it look cohesive. It added more work, sure, but it’s the first step in getting the trim in the whole house to match.
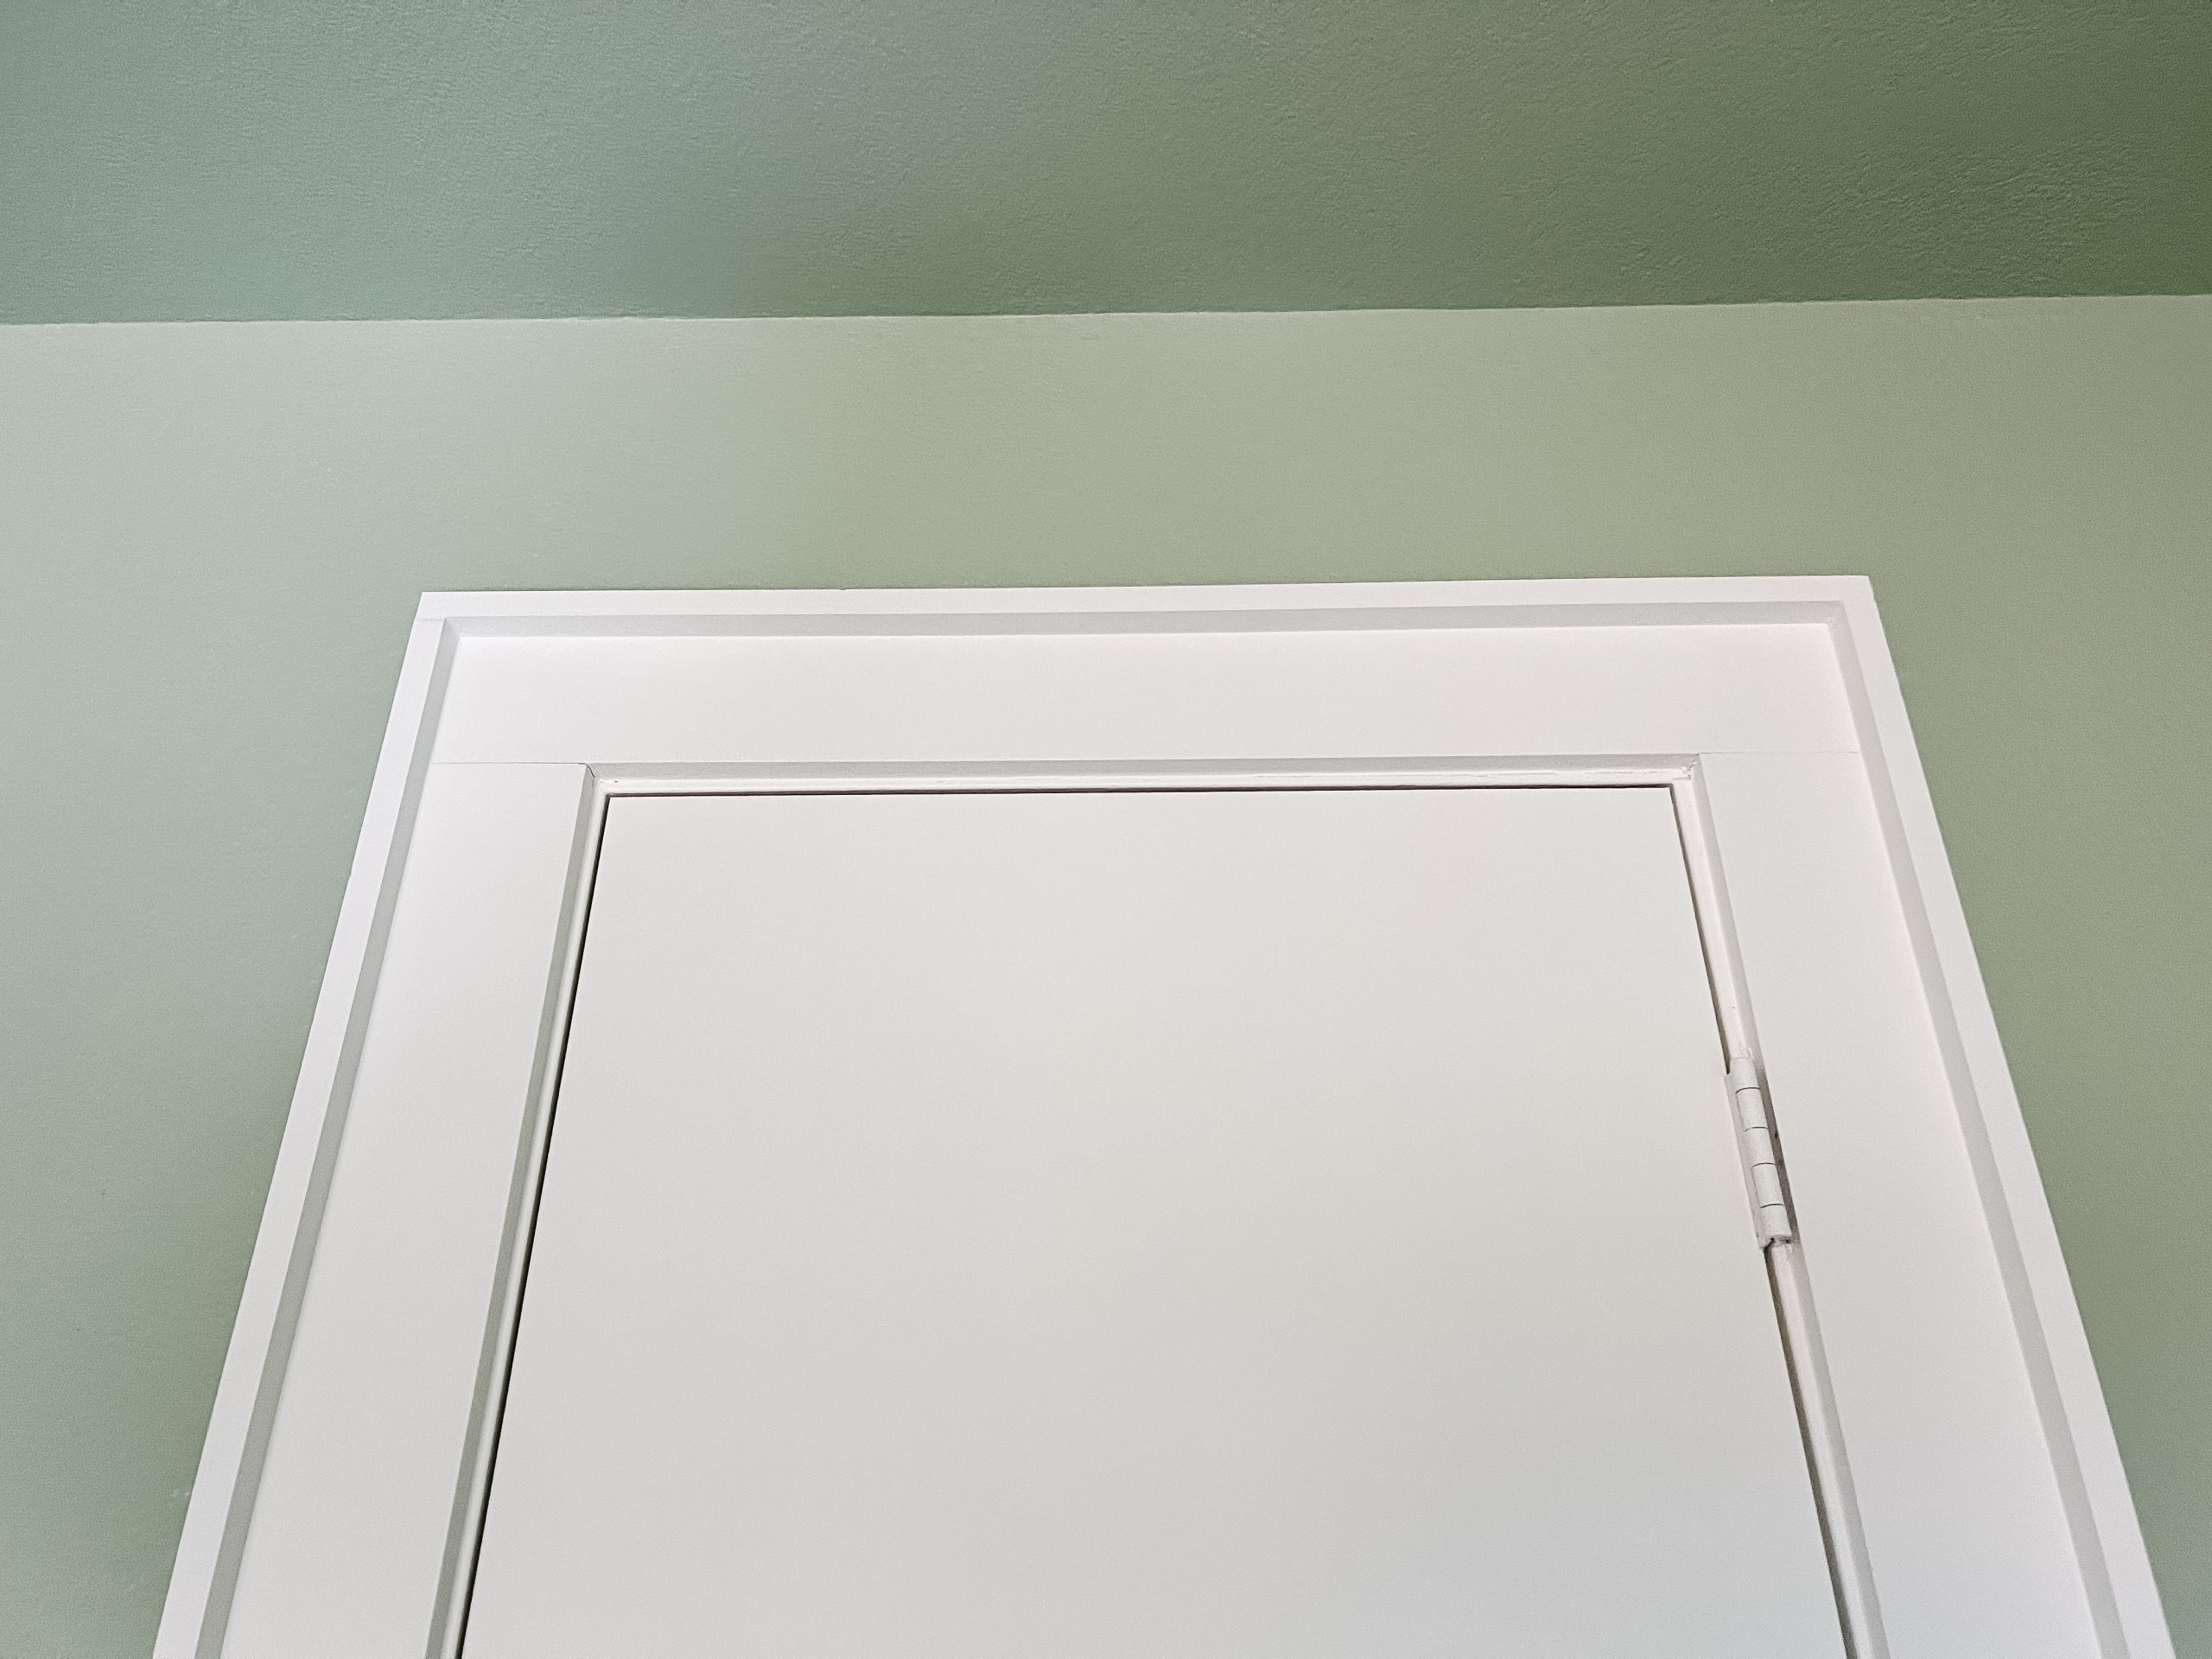
PRO TIP: Get one of these caulk remover tools, it works like a charm!
Now for the baseboards: since this is a closet and will be mostly hidden by the desk, I opted for a butt joint instead of my preferred scarf joint. Don’t worry, I will be doing a scarf joint in the rest of the room!

*We will have to frame around the desk as well, but obviously, at this point, there is not a desk to frame around! Check out how I went about this in step four!
STEP 3: Details
When I stepped back and admired the fully framed nook, I realized a few details had been overlooked, but none that can’t be fixed!
First, I noticed that the shelves (that I left up from the original closet), looked a bit too thin compared to the new trim. Working smarter, not harder, I attached these fun, squiggly pieces of wood used in roofing to the existing shelves for some visual interest! I know these aren’t for everyone, but are you a part of the Squiggle Squad? I simply attached these with a brad nailer and then filled in the gap with plastic wood and sanded it down flush.

Second, I realized that it is pretty helpful to have an outlet by a desk (duh). There wasn’t an existing outlet in the closet, so we had an electrician come in and add one. We will then use one of these desk clamps to make the outlets easy to access from the desk!
We have shelf trim and electrical, now it’s time to paint. I knew I wanted a bold blue, but perfecting the shade took some time.

*Note: This picture was taken before the shelf trim going in
Once the perfect blue was selected – stay tuned – it was time to get priming! I grabbed my Handy Paint Pail (IYKYK) and got to work!
STEP Four: The Built-In Desk
We have a beautiful blue nook, but now it’s time to add the desk! I started with the framing for the desktop. A laser level makes this 10x easier!

Using pocket holes, screws, and wood glue, I added the braces to the frame.

Next, it’s time to work on the desktop! I used plywood, sanded it down so it was smooth, then gave it a good wipe-down to prep for the stain. I used a microfiber cloth, which worked like a charm–a tack cloth would do the trick as well!
Once the plywood is sanded and cleaned, it’s time to start staining! If you’ve been following me for a while, you may have noticed Simply White by Minwax USA is my favorite. So to no one’s surprise, that is the color I went for with this project!

SAFETY REMINDER: Once you’re done with a stain rag, soak it in a bucket of water. Then, wring out the rag and allow it to dry flat, preferably outside. The key is to keep anything from smothering the rag as it dries since it releases heat as it dries and could start a fire!
I stained a smaller piece of wood that will be used for the front of the desk.

Now that the desktop and front are stained, I applied a couple of coats of Polyurethane. The Handy Paint Pail cup is perfect for smaller jobs like this! I would do at least 5 coats.
Next, I brought the top and front of the desk upstairs and placed it on the frame. To secure it, I used this genius way to fill in the nail holes (thanks to Abby Road Home)! You lay painter’s tape and shoot brad nails through it, then apply wood filler. Then you can remove the tape and you won’t know there was ever a nail hole there! If the color doesn’t match perfectly, don’t worry, you can always go over it with another wood-fill color. Either way, once the holes are filled, lightly sand them down.
The desk is in, filled, and looking great! I wanted to clean up the inside of the opening a bit and add trim, just to cover up the exposed drywall, so I added just a simple piece of white trim to match the front of the nook.

Don’t you love how the trim makes the desk look super built-in?
From there, I caulked around the trim and where the desk meets the walls. Once the caulk dried, it was time to touch up all the blue paint! Some of it got a little beat up when we were putting the desktop in. Easy fix!
The secret to extra crispy paint lines is caulk! Tape off the area, lay down a bead of 20-minute drying caulk, then let it dry for 10-15 minutes. Paint over it, let the paint dry, then voila! Crispy line.
STEP FIVE: STYLING THE BUILT-IN DESK NOOK
DIY-ing a built-in desk has been so rewarding! Now it’s time to take it to the finish line! Styling is one of my favorite parts of any project.
First up: Install the light and art.
I found this rechargeable picture light on Amazon and knew it would be perfect here! The beautiful artwork is by one of my favorite artists Figure Form. You can find the BlueBird print here.
Next, I decided to stain a picture frame to perfectly match the desk. The contrast against the blue walls makes me so happy! Especially because the art I chose for this area has a bold blue in it as well.
Lastly, I added cute office supplies to the shelf, and BOOM! We no longer have a MASSIVE closet; instead, we have a cute and functional desk nook for our guests to use!


I really loved how this turned out and even though it may feel like a “small” project, it feels so big to me! It combined so many of my favorite aspects of DIY and allowed me to be creative and push myself in the direction I want to see my home go in.
If you need a sign to push yourself, this is it! You can create the home you’ve always dreamed of. You can take risks, remember DIY is never permanent!
I hope you love this DIY Desk Nook as much as I do.
AFTER
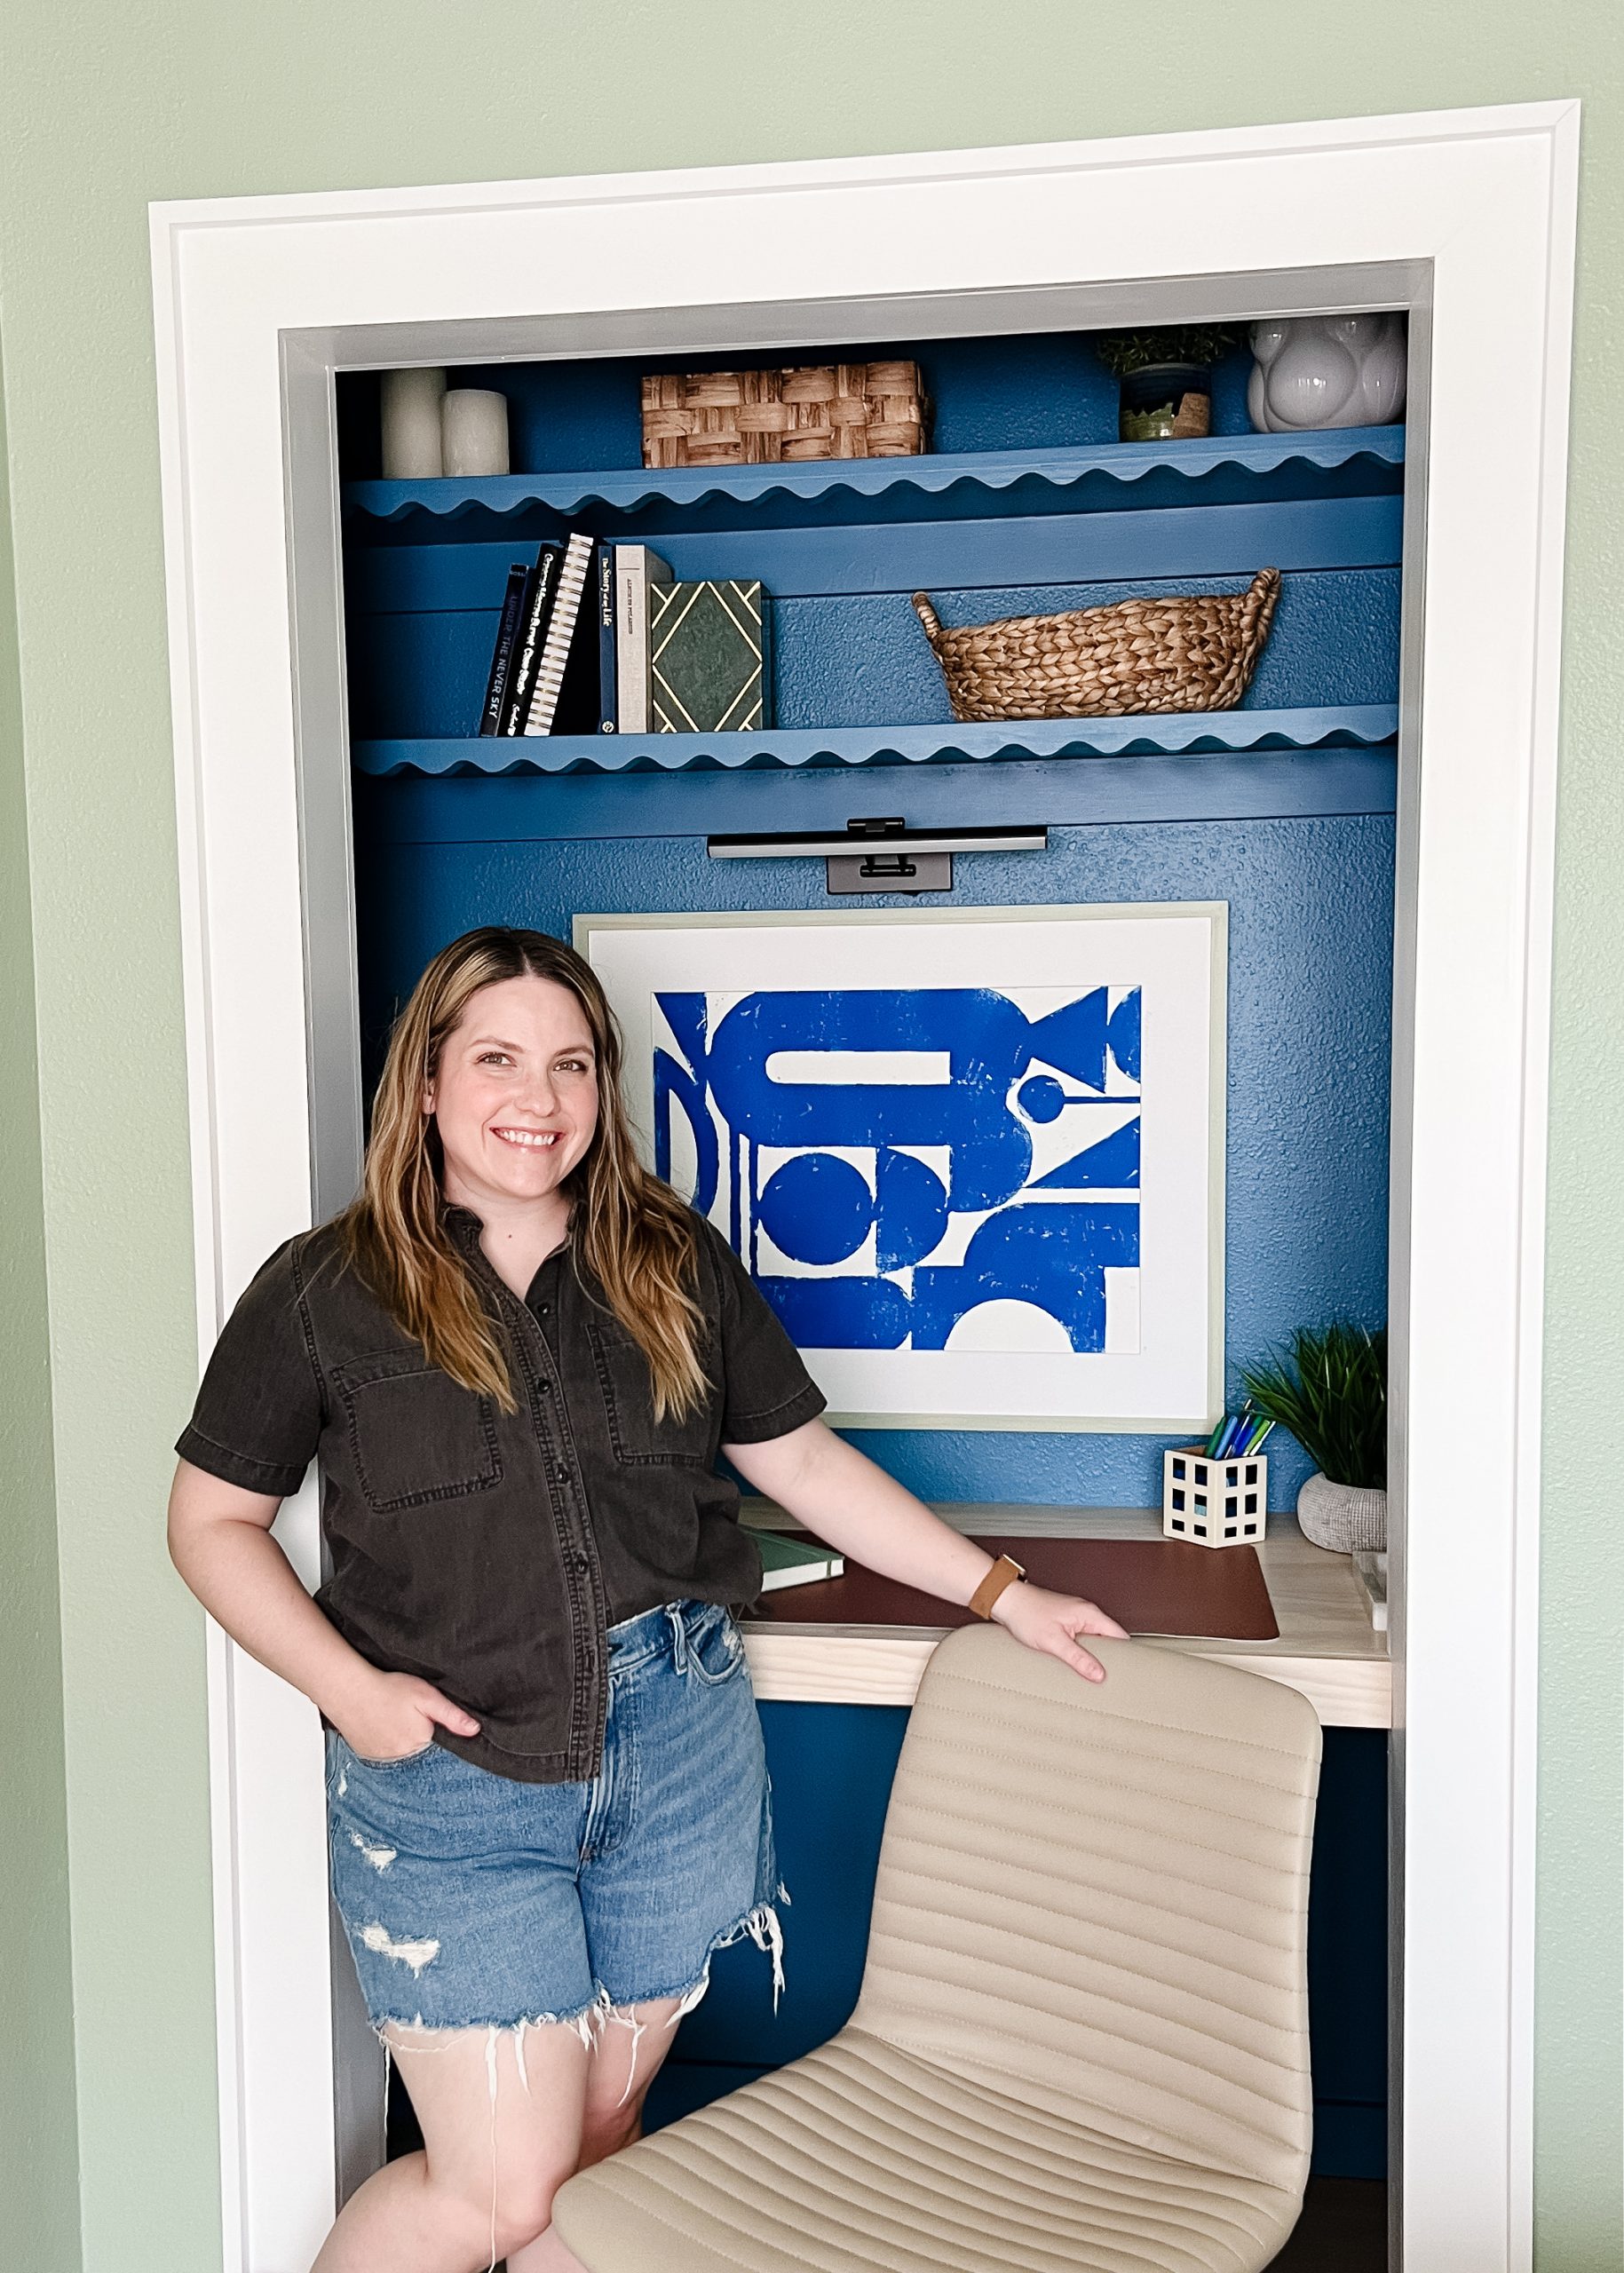

Sources:
Wall Paint Color – Money Moves By Clare Paint
Nook Color – Jay Bird by BEHR
Art – Figure Form
Want to know more about the flooring? Check it out here!
Want to make some fun styling pieces? Check out this DIY Polymer Clay Bowl!
Note: If you buy something through our links, we may earn an affiliate commission or have a sponsored relationship with the brand, at no cost to you. We recommend only products we genuinely like. Thank you so much.